A Simple Guide to Making Espresso with Your Ninja Coffee Maker
Ever dream of whipping up barista-worthy espresso drinks at home without the hefty price tag of a fancy machine? Well, hold onto your mugs, coffee lovers, because your trusty Ninja Coffee Maker might just hold the key! While it may not be a true espresso machine in terms of pressure, some Ninja Coffee Barista Systems boast an “espresso” setting that can brew a strong coffee concentrate perfect for creating your favorite espresso-based beverages.
Intrigued? We thought so! This guide will walk you through everything you need to know about brewing “espresso” with your Ninja Coffee Maker, from ensuring compatibility to crafting delicious lattes, cappuccinos, and more. So, grab your favorite coffee beans and get ready to transform your Ninja into a platform for espresso magic!
Before You Brew: Gearing Up for Success
Before you embark on your espresso-making adventure, let’s make sure you have everything set up for brewing success. Here’s what you’ll need:
Compatibility Check:
Not all Ninja Coffee Makers are created equal! The magic ingredient here is the “espresso” setting. Here’s how to confirm your Ninja is up for the task:
- Grab your user manual: This trusty companion should have a clear list of features for your specific model. Look for the presence of an “espresso” setting or function.
- Check the Ninja website: If your manual is MIA, don’t fret! Head over to the Ninja website and navigate to the support section. There, you can search for your model number and access its specifications.
Gathering Your Supplies:
Now that you’ve confirmed compatibility, it’s time to gather your brewing essentials:
- Finely ground coffee: This is crucial! Unlike drip coffee, espresso requires a much finer grind. Think the consistency of finely ground sand. Pre-ground espresso coffee is readily available at most grocery stores, or you can grind your own beans using a burr grinder for the freshest flavor.
- Filtered water: Fresh, filtered water is key to a delicious cup of “espresso.” It ensures optimal extraction and prevents any funky flavors from tainting your brew.
- Milk (optional): If you’re craving creamy latte art or frothy cappuccinos, you’ll need milk. Whole milk is a classic choice, but dairy alternatives like almond or oat milk work too!
Pro Tip: Using a burr grinder allows for more consistent grind size, which plays a big role in extracting the perfect espresso flavor.
Brewing Your Ninja “Espresso”: A Step-by-Step Guide
Now that you’ve verified compatibility and gathered your supplies, it’s time to brew! Here’s a detailed breakdown of the process, ensuring a smooth (and delicious) journey:
Filling the Reservoir:
Freshness is everything when it comes to coffee, so start by filling the reservoir with fresh, filtered water. Many Ninja Coffee Makers have a designated “Single Serve” fill line for espresso brewing. Consult your user manual for specific instructions on filling for the “espresso” setting on your model.
Preparing the Coffee Basket:
Your Ninja Coffee Maker likely comes with a dedicated espresso basket, which is smaller than the one you use for regular coffee brewing. Locate this basket and place it in the designated holder. Now comes the fun part: adding the coffee grounds!
Choosing the Right Amount:
The ideal amount of coffee grounds for your “espresso” brew depends on your specific Ninja model and whether you’re aiming for a single or double shot. Here’s how to find the sweet spot:
- Refer to your user manual: This is your golden ticket! The manual will usually have specific recommendations for the amount of coffee grounds to use for the “espresso” setting, taking into account your desired shot size (single or double).
- Start with a baseline: If your user manual is missing in action, don’t worry! Most Ninja Coffee Makers recommend using around 2 tablespoons of finely ground coffee for a single shot and 4 tablespoons for a double shot. This can be a good starting point, but feel free to adjust based on your taste preference.
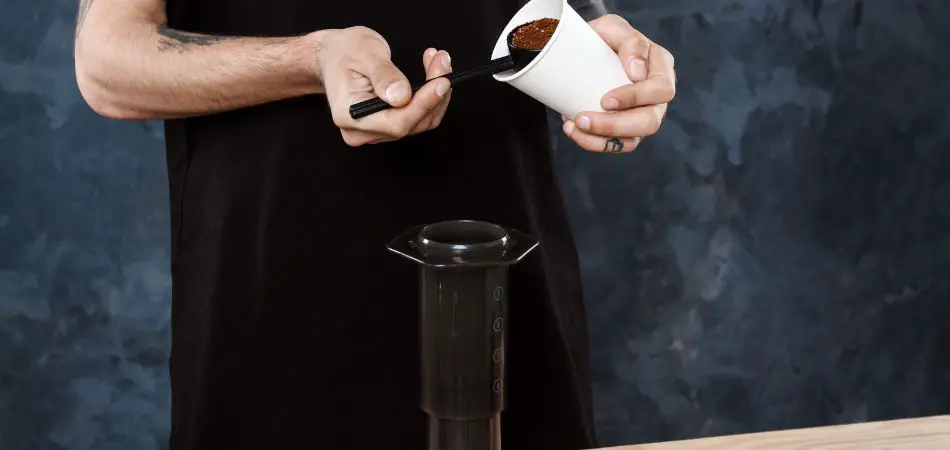
Adding the Grounds:
Once you’ve determined the right amount, gently add the finely ground coffee to the espresso basket. Avoid packing the grounds too tightly, as this can lead to a bitter brew. A light tamp with the back of a spoon is sufficient to ensure even extraction.
Selecting the “Espresso” Setting:
Now comes the moment of truth – selecting the “espresso” setting on your Ninja Coffee Maker. The location of this setting will vary depending on your specific model. Here’s how to navigate:
- Button Bonanza: Some Ninja Coffee Makers have a dedicated “espresso” button, making it a breeze to select the desired setting.
- Menu Magic: Other models might require navigating a menu to find the “espresso” option. Consult your user manual for clear instructions on locating this setting on your specific machine.
Brewing and Enjoying (Almost):
Once you’ve selected the “espresso” setting, it’s time to let your Ninja Coffee Maker work its magic. Press the designated button or confirm your selection on the menu, and watch as your machine brews your concentrated coffee directly into a cup.
Pro Tip: The brewing process might take a few seconds longer than regular coffee brewing due to the finer grind and higher pressure used for the “espresso” setting. Be patient – your delicious espresso reward awaits!
Frothing Milk for Latte Art or Creaminess (Optional)
Calling all latte art enthusiasts and cappuccino connoisseurs! This section is for you. While your Ninja Coffee Maker might not be a full-fledged espresso machine, it can still help you create delightful espresso-based drinks with a touch of frothed milk magic.
Gearing Up for Frothing:
Before you dive into frothing, you have a couple of options:
- Built-in Frother: Many Ninja Coffee Makers boast a built-in frother wand. This is a convenient option for creating frothed milk right in your machine.
- Separate Frothing Pitcher: If your Ninja doesn’t have a built-in frother, or you prefer more control over the frothing process, you can use a separate frothing pitcher and a handheld milk frother (electric or manual).
Preparing the Milk:
Now that you’ve chosen your frothing method, let’s get the milk ready:
- Milk Choice: Whole milk is the traditional choice for frothing due to its higher fat content, which creates a richer and creamier texture. However, feel free to experiment with non-dairy alternatives like almond milk, oat milk, or soy milk! Just keep in mind that these may not froth as thickly as whole milk.
- Heating the Milk: You can heat the milk in a dedicated milk frothing pitcher (if using a separate frother) or a microwave-safe container. Aim to heat the milk to just below simmering (around 140°F). You can use a thermometer to monitor the temperature, or simply watch for tiny bubbles forming around the edges of the milk. Avoid boiling the milk, as this can scorch it and alter the taste.
Pro Tip: If you prefer cold frothed milk for iced lattes, you can skip the heating step altogether and use cold milk straight from the fridge.
Frothing with Your Ninja’s Built-in Frother (or Separate Frother):
Here’s where the fun begins!
- Fill the Pitcher (Optional): If you’re using a separate frothing pitcher, fill it with your chosen milk to just below the fill line to avoid overflow during frothing.
- Submerge the Frother Wand: For both built-in and separate frothers, immerse the frother wand just below the surface of the milk, making sure it doesn’t touch the bottom of the pitcher.
- Turn on the Frother: Activate the frother function on your Ninja Coffee Maker (if using the built-in frother) or turn on your handheld frother.
- Frothing Time: Depending on your desired consistency, froth the milk for 30-60 seconds. Here’s a breakdown for different textures:
- Microfoam (for Latte Art): Aim for a small, dense bubble structure with a silky consistency. This is ideal for creating latte art designs. Frothing for 30-45 seconds should achieve this texture.
- Thicker Foam (for Cappuccino): For a richer, creamier foam suitable for cappuccinos, froth for a longer duration (45-60 seconds). The foam will be thicker with larger bubbles.
- Swirl it Up! Once you’ve achieved the desired consistency, turn off the frother and give the milk a quick swirl with a spoon to create a smooth, even texture.
Pro Tip: Experiment with frothing times to find the perfect consistency for your favorite drinks. Remember, practice makes perfect when it comes to latte art!
Crafting Your Perfect Espresso Beverage: A Recipe Extravaganza
Now that you’ve brewed your concentrated “espresso” and mastered the art of frothing milk (optional), it’s time to unleash your inner barista and create your dream coffee concoction! Here’s a breakdown of some popular espresso-based drinks, along with step-by-step instructions:
The Classic Espresso:
For the purists out there, nothing beats a simple and elegant shot of espresso.
- Brew it Up: Follow the steps outlined in the “Brewing Your Ninja ‘Espresso'” section to craft your concentrated coffee.
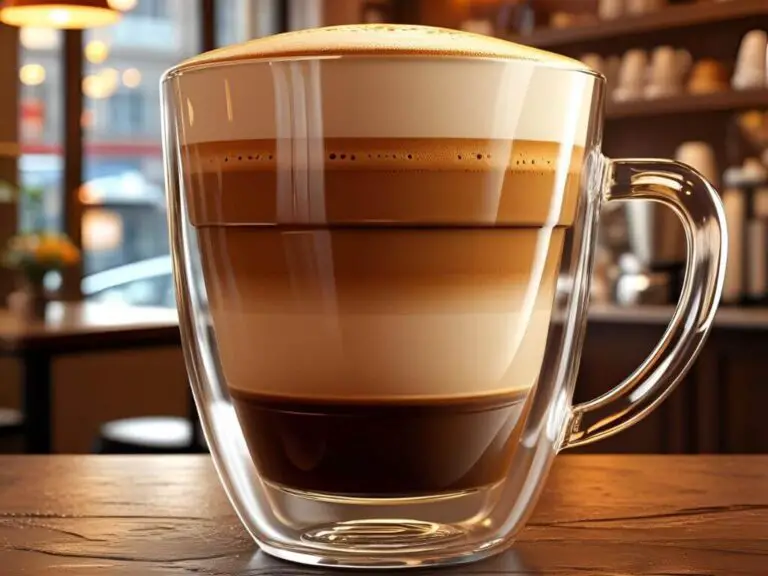
- Serving Suggestion: Pour the freshly brewed espresso into a demitasse cup (a small espresso cup) and savor the bold, rich flavor.
Brewing Up a Storm: Milk-Based Delights
Here’s where things get exciting! Get ready to create some barista-worthy beverages with your frothed milk and “espresso”:
1. Cappuccino: This Italian classic features equal parts espresso, steamed milk, and frothed milk.
- Ingredients:
- Single or double shot of espresso (brewed with your Ninja)
- Steamed milk (around 4 oz)
- Frothed milk (around 4 oz)
- Instructions:
- Brew your espresso using the “espresso” setting on your Ninja Coffee Maker.
- Steam your milk to just below simmering (around 140°F) using the built-in steamer (if available) or a separate milk frother. Aim for a smooth, velvety texture with minimal large bubbles.
- Pour the steamed milk into a mug, holding back the foam with a spoon. This creates a nice layering effect.
- Gently spoon the frothed milk on top of the steamed milk, creating a thick and creamy layer.
- Enjoy your delicious cappuccino!
2. Latte: This popular drink features a base of steamed milk with a shot of espresso poured over it, topped with a thin layer of frothed milk.
- Ingredients:
- Single or double shot of espresso (brewed with your Ninja)
- Steamed milk (around 6 oz)
- Frothed milk (around 1-2 oz)
- Instructions:
- Brew your espresso using the “espresso” setting on your Ninja Coffee Maker.
- Steam your milk to just below simmering (around 140°F) as described in the cappuccino instructions.
- Pour the steamed milk slowly into a mug, tilting it slightly to create a layered effect. Stop pouring when you reach about ¾ of the mug’s capacity.
- Gently pour your espresso shot over the steamed milk. You should see a distinct layer of espresso separating from the milk.
- Top it all off with a thin layer of frothed milk for a touch of creaminess.
- Enjoy your latte!
3. Mocha: This indulgent drink adds a layer of flavored syrup (typically chocolate) to the classic latte for a decadent treat.
- Ingredients:
- Single or double shot of espresso (brewed with your Ninja)
- Steamed milk (around 6 oz)
- Frothed milk (around 1-2 oz)
- Flavored syrup (chocolate, caramel, etc.) – to taste
- Instructions:
- Brew your espresso using the “espresso” setting on your Ninja Coffee Maker.
- Steam your milk to just below simmering (around 140°F) as described in the cappuccino instructions.
- Add your desired amount of flavored syrup to a mug.
- Pour the steamed milk into the mug, stopping when you reach about ¾ of the capacity.
- Gently pour your espresso shot over the steamed milk.
- Top it all off with a thin layer of frothed milk for a touch of creaminess.
- Enjoy your decadent mocha!
Room for Creativity:
These are just a few basic recipes to get you started. Feel free to experiment with different flavors and ingredients to create your own signature espresso drinks! Here are some ideas:
- Spice it Up: Add a sprinkle of cinnamon, nutmeg, or even a pinch of cayenne pepper for a unique flavor twist.
- Syrup Symphony: Explore flavored syrups beyond chocolate and caramel. Try options like vanilla, hazelnut, or even lavender for a floral touch.
- Fruity Fusion: Add a splash of fruit puree or flavored syrups like mango or raspberry for a refreshing twist, especially for iced espresso drinks.
With a little practice and your trusty Ninja Coffee Maker, you’ll be whipping up barista-worthy espresso beverages in no time!
Tips for Brewing Ninja Coffee Maker “Espresso” Like a Pro:
Now that you’ve unlocked the hidden espresso potential of your Ninja Coffee Maker, here are some pro tips to elevate your brewing experience and ensure consistently delicious results:
Freshly Ground Coffee is King:
This cannot be stressed enough! For the best flavor and aroma, freshly grind whole coffee beans just before brewing your “espresso.” Pre-ground coffee tends to lose its potency and freshness quickly.
- Grind Size Matters: Remember, espresso requires a much finer grind compared to regular drip coffee. Think of the consistency of finely ground sand.
- Invest in a Burr Grinder (Optional): While not essential, a burr grinder offers superior consistency in grinding, leading to a more even extraction and a more flavorful “espresso” brew.
The Perfect Grind: Experimentation is Key:
Finding the ideal grind size for your Ninja Coffee Maker and desired taste might require some experimentation. Here’s how to find your sweet spot:
- Start with Recommendations: Refer to your user manual for specific grind size recommendations based on your model and shot size (single or double).
- Adjust Based on Taste: If your first attempt yields a weak or bitter brew, adjust the grind size accordingly. A finer grind will result in a stronger brew, while a coarser grind will yield a weaker one.
- Small Adjustments, Big Results: Make small adjustments to the grind size and taste-test your “espresso” after each adjustment. This will help you dial in the perfect grind for your Ninja and taste preference.
Cleaning is Key for Optimal Performance:
Just like any other coffee machine, regular cleaning is crucial for maintaining the performance and lifespan of your Ninja Coffee Maker. Here are some key cleaning points:
- Cleaning the Coffee Basket: After each use, empty the coffee grounds from the basket and rinse it thoroughly with warm water. You can also use a soft brush to remove any stubborn coffee grounds.
- Descaling: Over time, mineral buildup from your water can occur inside the machine. Consult your user manual for recommended descaling frequency and instructions specific to your model. Regular descaling ensures optimal performance and prevents malfunction.
- Cleaning the Frother Wand (if applicable): If you utilize the built-in frother, clean it after each use. Wipe it down with a damp cloth to remove any milk residue. Some models might recommend submerging the wand in hot water for a deeper clean. Refer to your user manual for specific cleaning instructions for your frother wand.
By following these pro tips, you’ll be brewing Ninja Coffee Maker “espresso” like a seasoned barista in no time!
Conclusion: Your Ninja Coffee Maker
Congratulations! You’ve reached the end of this comprehensive guide on brewing “espresso” with your Ninja Coffee Maker. Now you’re equipped with the knowledge and techniques to unlock a world of delicious coffee creations at home!
Remember, while this method won’t produce true espresso due to pressure limitations, it offers a fantastic alternative for crafting barista-worthy drinks that are both convenient and budget-friendly. So, ditch the long lines and expensive café visits, and unleash your inner barista with your trusty Ninja!
Troubleshooting Common Ninja Coffee Maker “Espresso” Woes
Even with the best intentions, brewing challenges can arise. Here are some common issues you might encounter when brewing “espresso” with your Ninja Coffee Maker, along with solutions to get you back on track:
Problem 1: Weak or Watery Brew
- Possible Culprit: Coarse grind size.
- Solution: Adjust your grinder to a finer setting. Remember, espresso requires a much finer grind than drip coffee.
- Additional Tip: Ensure you’re using the correct amount of coffee grounds for your desired shot size (refer to your user manual for specific recommendations).
Problem 2: Bitter Brew
- Possible Culprit: Over-extraction due to a few factors.
- Fine grind size: If your grind is too fine, it can lead to over-extraction, resulting in a bitter taste.
- Over-brewing: Leaving the espresso brewing for too long can also lead to bitterness.
- Fine grind size: If your grind is too fine, it can lead to over-extraction, resulting in a bitter taste.
- Solution:
- Adjust your grinder to a slightly coarser setting if your current grind is very fine.
- Monitor the brewing process and stop the brewing cycle once the desired amount of espresso has been brewed (consult your user manual for estimated brew times for espresso shots).
- Adjust your grinder to a slightly coarser setting if your current grind is very fine.
Problem 3: Frother Not Working Properly
- Possible Culprit: Clogged frother wand due to milk residue buildup.
- Solution: Ensure you’re cleaning the frother wand thoroughly after each use. Wipe it down with a damp cloth and remove any milk residue. Refer to your user manual for specific cleaning instructions for your model’s frother wand. Some models might recommend submerging the wand in hot water for a deeper clean.
Problem 4: Machine Not Recognizing “Espresso” Setting
- Possible Culprit: Outdated firmware.
- Solution: Check your Ninja Coffee Maker’s user manual or visit the Ninja website to see if a firmware update is available for your specific model. Installing the latest firmware can often resolve compatibility issues and ensure optimal functionality.
If you encounter any issues beyond these, don’t hesitate to consult your user manual or contact Ninja customer support for further assistance.
With this troubleshooting guide as your backup, you can confidently navigate any brewing challenges and keep your Ninja Coffee Maker “espresso” flowing smoothly!
FAQs: What the Audience Might Think
Based on the blog post, here are some potential FAQs your audience might have and answers to address them:
Can my Ninja Coffee Maker really brew espresso?
Not technically true espresso due to pressure limitations. However, it can brew a strong coffee concentrate perfect for creating delicious espresso-based drinks at home.
What if I don’t have a built-in frother?
No worries! You can use a separate handheld milk frother for creating frothed milk.
What grind size should I use for the “espresso” setting?
The ideal grind size depends on your specific Ninja model. The guide recommends referring to your user manual for recommendations and highlights the importance of a fine grind for espresso.
My espresso is coming out weak/bitter. How can I adjust it?
The grind size and brewing time can affect the strength. The guide provides troubleshooting tips for both weak and bitter brews, suggesting adjusting grind size and monitoring brewing time.
How do I clean the frother wand?
Cleaning is crucial! The guide emphasizes wiping down the frother wand with a damp cloth after each use and refers to your user manual for specific cleaning instructions for your model.
Isn’t a dedicated espresso machine better?
Yes, for true espresso with higher pressure. However, a Ninja Coffee Maker offers a convenient and budget-friendly alternative for creating barista-worthy drinks at home.
How much money can I save by making my own espresso drinks?
The cost savings can be significant, especially if you’re a frequent coffee shop visitor. The guide positions the Ninja Coffee Maker method as a money-saving option.
By addressing these potential FAQs, you can anticipate your audience’s questions and provide them with the information they need to feel confident brewing “espresso” with their Ninja Coffee Maker.