Craving Espresso? Learn How to Make Espresso Without Machine
Ever wake up craving that intense, flavorful kick of espresso, only to realize you don’t have a fancy machine at home? Don’t worry, coffee lovers! You can still brew a strong, delicious cup that rivals your favorite espresso bar concoction without breaking the bank on a machine.
This guide will explore various methods for making espresso without a machine, each with its own advantages and quirks. We’ll delve into the step-by-step process for each method, ensuring you can enjoy a satisfying espresso experience from the comfort of your own kitchen. So, grab your favorite mug, some freshly roasted beans, and let’s get brewing!
What is an Espresso Machine?
For coffee lovers seeking intensity and a touch of elegance, the espresso machine reigns supreme. This countertop wonder brews coffee unlike any other, producing a concentrated shot packed with flavor and topped with a luscious layer of crema. But what exactly is an espresso machine, and how does it work its magic?
The Science Behind the Shot
Unlike a drip coffee maker that relies on gravity and hot water to slowly extract coffee essence, espresso machines utilize high pressure to force near-boiling water through finely-ground coffee beans. This pressurized brewing process happens quickly, typically within 25-30 seconds, resulting in a small, concentrated shot bursting with flavor.
The Core Components
While there are various types of espresso machines, they all share some common components:
- Boiler: Heats water to the optimal brewing temperature (around 195°F or 90°C).
- Pump: Creates the high pressure (around 9-15 bars) needed to force hot water through the coffee grounds.
- Grouphead: Houses the portafilter and dispenses the brewed espresso.
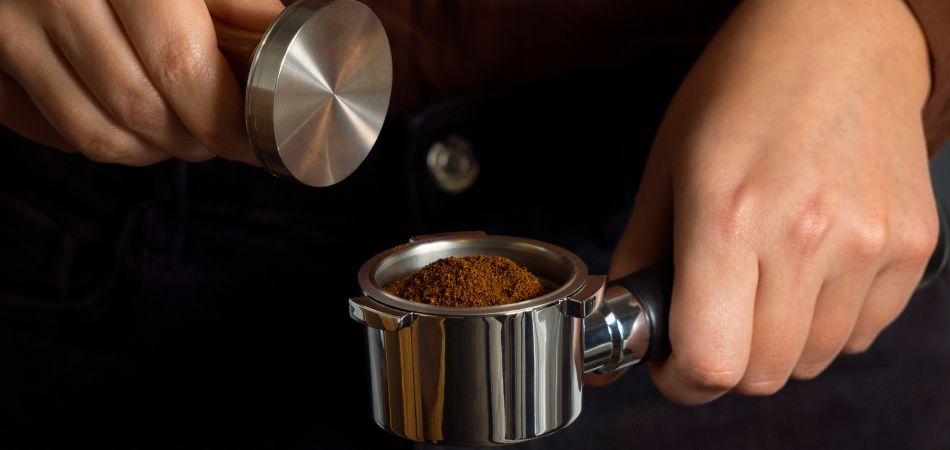
- Portafilter: A metal holder that contains a basket for finely ground coffee.
Different Types of Espresso Machines
There are several types of espresso machines available, each with its own advantages and complexities:
- Pump-driven espresso machines: These are the most common type of home espresso machine, utilizing an electric pump to create the pressure. They offer more control over the brewing process compared to other types.
- Steam-driven espresso machines: These rely on steam pressure generated by boiling water to create pressure for brewing. They are typically less expensive than pump-driven machines but offer less control over the brewing process.
- Automatic espresso machines: These machines are fully automated, requiring minimal user intervention. They are ideal for beginners but may lack the customization options desired by coffee enthusiasts.
Espresso on a Budget: Machine-Free Brews Methods
While a high-pressure espresso machine might be the gold standard for brewing espresso, achieving a strong and flavorful coffee experience is possible without one.
This section dives deep into various brewing methods, explaining the process, highlighting pros and cons, and offering tips for optimal results.
The Classic French Press: Simple Yet Effective
The humble French Press is a versatile brewing tool, and with a few adjustments, it can be your gateway to machine-free espresso. Here’s how to use it:
- Grind: The key to a good espresso-style brew with a French Press lies in the grind size. Aim for a fine grind, similar to table salt. Pre-ground coffee labeled for espresso will work well.
- Coffee Quantity: Since a French Press relies on immersion brewing (grounds steeping in water), you’ll need to increase the coffee-to-water ratio for a stronger brew. A good starting point is a 2:1 ratio, meaning 2 tablespoons of finely ground coffee for every 3.5 ounces of water.
- Water Temperature: Just like with any brewing method, water temperature plays a crucial role. Aim for water that’s just off the boil, around 200°F (93°C). Boiling water can scald the coffee, resulting in a bitter taste.
- Brewing Process:
- Preheat your French Press with hot water for a few minutes. This helps maintain a consistent brewing temperature. Discard the preheating water.
- Add your measured coffee grounds to the French Press.
- Bloom the grounds: Pour a small amount of hot water (just enough to saturate the grounds) and let it sit for 30 seconds. This allows the coffee to release CO2, leading to a more even extraction.
- After blooming, gently pour the remaining hot water over the grounds, ensuring all the coffee is saturated. Stir gently to ensure even distribution.
- Place the lid on the French Press, but don’t plunge yet. Let the coffee steep for 4 minutes.
- The Plunge: Once the steeping time is complete, slowly and firmly press down the plunger. Aim for a smooth, even press to extract the maximum flavor from the grounds.
- Pros: The French Press is a readily available and affordable brewing tool. It’s also relatively easy to use and clean.
- Cons: While the French Press can produce a strong coffee, it might not have the thick crema layer typically associated with espresso. Additionally, some sediment might find its way into your final cup compared to other methods.
Tips for a Stronger French Press “Espresso”:
- Experiment with a slightly finer grind size or even a slightly higher coffee-to-water ratio to find your personal strength preference.
- Use a fine mesh filter to minimize sediment in your final cup.
This concludes our exploration of the French Press method. Up next, we’ll delve into the AeroPress, another popular option for brewing a concentrated coffee experience at home. Stay tuned!
The AeroPress: Portable Powerhouse for Espresso-Like Coffee
The AeroPress has become a favorite among coffee enthusiasts for its portability, ease of use, and ability to produce a strong, flavorful cup. Here’s how to unlock its potential for brewing a machine-free espresso:
- Grind: Similar to the French Press, a fine grind is key for a concentrated espresso-style brew. Pre-ground espresso or a setting just slightly coarser than espresso on your grinder will work well.
- Coffee Quantity: While the standard AeroPress recipe uses around 17-20 grams of coffee, you can experiment with slightly more (up to 22 grams) for a stronger brew.
- Water Temperature: Maintain the same water temperature as the French Press: just off the boil, around 200°F (93°C).
- Brewing Process:
- Prepare your AeroPress by placing a filter in the cap and pre-wetting it with hot water (discard the water). This helps remove any paper taste and ensures a good seal.
- Add your measured coffee grounds to the filter chamber.
- Bloom the grounds by pouring a small amount of hot water (just enough to saturate the grounds) and letting it sit for 30 seconds.
- After blooming, fill the rest of the AeroPress chamber with hot water.
- Give it a gentle stir to ensure even saturation of the grounds.
- Place the AeroPress on your mug and press down slowly and firmly through the filter. Aim for a smooth, controlled press for optimal extraction.
- Pros: The AeroPress is incredibly portable, making it a great choice for travel or camping. It’s also relatively easy to use and clean compared to some other methods. Additionally, the AeroPress can produce a stronger coffee than the French Press, with a thin layer of crema.
- Cons: Compared to the French Press, the AeroPress requires an initial investment. However, its versatility and portability make it a worthwhile option for many coffee lovers.
Tips for a More Espresso-Like AeroPress Shot:
- For an even stronger and more espresso-like brew, consider the “inverted method.” This involves flipping the AeroPress upside down and placing it on your mug with the filter chamber filled with grounds. Pour your hot water and let it steep for 30 seconds, then slowly press the plunger down to force the coffee through the filter into your mug.
- Experiment with slightly finer grind sizes and a shorter steeping time (around 20-30 seconds) to find your ideal strength and flavor profile.
The AeroPress offers a fantastic option for those seeking a strong and portable espresso-like coffee experience. Up next, we’ll explore the Moka Pot, a stovetop brewer known for its bold coffee and crema production.
The Moka Pot: Stovetop Power for Bold Coffee with Crema
The Moka Pot, also known as a stovetop espresso maker, offers a unique approach to brewing a strong, concentrated coffee. Unlike the French Press and AeroPress, it utilizes steam pressure to create a brew that resembles espresso in both strength and crema. Here’s how to conquer the Moka Pot:
- Grind: Unlike the previous methods, the Moka Pot requires a grind size that’s slightly coarser than drip coffee, but finer than espresso. Aim for a consistency similar to coarse sand. Pre-ground coffee labeled for Moka Pots will work well.
- Coffee Quantity: Fill the Moka Pot’s filter basket with coffee grounds to just below the rim. Avoid tamping the grounds down, as this can hinder proper water flow and potentially lead to a bitter brew.
- Water: Fill the lower chamber of the Moka Pot with cold, filtered water just below the pressure relief valve. Using cold water ensures even extraction throughout the brewing process.
- Brewing Process:
- Assemble the Moka Pot by screwing the top chamber firmly onto the base containing the coffee grounds and water.
- Place the Moka Pot on a stovetop burner over medium heat.
- As the water heats up, it will rise through the coffee grounds and create steam pressure. This pressure forces the brewed coffee up into the upper chamber.
- Once the coffee pot begins to gurgle or sputter, indicating the brewing process is nearing completion, remove it from the heat source. It’s important to avoid letting it continue sputter for extended periods, as this can scorch the coffee.
- Safety First: Never open a hot Moka Pot while it’s still pressurized. Wait for any sputtering to subside before carefully unscrewing the top chamber.
- Pros: The Moka Pot offers a budget-friendly way to achieve a strong, bold coffee with a nice crema layer, similar to espresso. It’s also relatively easy to use once you get the hang of it.
- Cons: Compared to other methods, the Moka Pot requires a bit more attention during the brewing process to avoid burning the coffee. Additionally, cleaning the Moka Pot can be a bit trickier due to its various components.
Tips for Mastering the Moka Pot:
- Experiment with different grind sizes to find the sweet spot between strength and bitterness.
- Use medium heat to ensure even extraction and avoid burning the coffee.
- Don’t overfill the filter basket with coffee grounds, as this can lead to overflow and a messy brewing experience.
- Once you remove the Moka Pot from the heat source, you can run the bottom chamber under cold water to quickly stop the brewing process and prevent over-extraction.
The Moka Pot provides a unique and rewarding option for those seeking a strong, espresso-like coffee experience with a touch of crema. Up next, we’ll explore some improvised methods for those seeking a quick and easy solution.
Strong Brewed Coffee (using your drip coffee maker)
This method offers a quick and easy solution for those seeking a strong cup of coffee, even without fancy equipment. While it won’t replicate a true espresso shot, it can create a bolder brew compared to a standard drip coffee.
Grind:
Similar to the other methods explored, a fine grind is key for this strong coffee approach. The finer grind particles will have more surface area, allowing for greater extraction of coffee flavors during the brewing process.
Pre-ground coffee labeled for drip coffee machines with a “fine” grind size will work well. If you have a whole bean grinder, aim for a consistency similar to table salt.
Coffee Quantity:
Here’s where we deviate from a standard drip coffee recipe. To achieve a stronger brew, we’ll double the amount of coffee grounds you would typically use.
For example, if your usual drip coffee recipe calls for 1 tablespoon of coffee per 6 ounces of water, this method recommends using 2 tablespoons of coffee grounds for the same amount of water.
Water Temperature:
While boiling water might seem ideal, it can actually scorch the coffee and lead to a bitter taste.
For optimal extraction and a balanced flavor profile, aim for water that’s just off the boil, around 200°F (93°C). Most drip coffee makers have built-in water heaters that will automatically reach this temperature range.
Brewing Process:
- Prepare your drip coffee maker: Place a coffee filter in the filter basket and add your measured amount of finely ground coffee.
- Fill the water reservoir: Use fresh, filtered water for the best results. Fill the reservoir with the desired amount of water, keeping in mind that you’re doubling the coffee grounds and aiming for the same amount of brewed coffee as usual (e.g., if you typically brew a 6-cup pot, use 6 cups of water).
- Start the brewing cycle: Turn on your drip coffee maker and let it brew the coffee as usual. The brewing time might be slightly longer due to the increased coffee grounds.
- Enjoy! Once the brewing cycle is complete, remove the carafe and enjoy your strong cup of coffee. Remember, while this method won’t produce crema like espresso, it can provide a bolder and more flavorful coffee experience compared to a standard drip coffee.
Pros:
- This method is incredibly simple and uses equipment you likely already have at home, making it a convenient option.
- Doubling the coffee grounds allows for a more concentrated and flavorful brew compared to a standard drip coffee.
Cons:
- Compared to other methods explored in this guide, this method produces the least concentrated coffee.
- It won’t create crema, a signature characteristic of espresso.
This method offers a great starting point for those seeking a stronger coffee experience without venturing outside the realm of their familiar drip coffee maker. However, if you’re looking for a truly espresso-like experience with crema, you might consider exploring some of the other methods outlined in this guide, such as the French Press, AeroPress, or Moka Pot.
Instant Espresso: The Quick and Easy Fix
For those mornings when time is of the essence, instant espresso offers a convenient and portable solution. While it may not replicate the full experience of a freshly brewed espresso shot, it can provide a quick caffeine kick with a close resemblance to espresso. Here’s what you need to know:
- Selection: Not all instant espressos are created equal. For the best flavor, choose a high-quality brand known for its taste and aroma. Look for options that are freeze-dried or micro-ground, as these methods tend to preserve more of the coffee’s flavor profile.
- Water Temperature: Avoid using boiling water, as this can scorch the instant espresso and lead to a bitter taste. Opt for hot water that’s just off the boil, around 195°F (90°C) for optimal results.
- Ratio: The recommended ratio for instant espresso typically falls between 2-3 teaspoons of instant espresso powder per 2 tablespoons of hot water. However, this can vary depending on the brand and your desired strength. Experiment to find the perfect balance for your taste buds.
Pros:
- Quick and Easy: Instant espresso is the undisputed champion of convenience. Simply add hot water and stir – no fancy equipment or brewing techniques required.
- Portable: Individual packets or small jars of instant espresso make it a perfect choice for travel or on-the-go coffee needs. You can easily enjoy a quick espresso-like drink anywhere, anytime.
Cons:
- Least Authentic Experience: Compared to other methods explored in this guide, instant espresso offers the least authentic espresso experience. The flavor profile may not be as complex or fresh as a freshly brewed shot.
- Limited Control: With instant espresso, you have less control over the extraction process and final flavor compared to brewing with whole beans.
While instant espresso may not be for everyone, it’s a handy option to have on hand for those busy mornings or whenever you need a quick and convenient caffeine fix.
Beyond the Basics: Tips for Success
No matter which method you choose, here are some general tips to ensure a successful and flavorful “espresso” experience:
- Grind Size is Crucial: As mentioned previously, grind size plays a significant role in extracting the desired flavors from coffee. A grind that’s too fine can lead to a bitter brew, while too coarse can result in a weak and under-extracted cup. Refer to the specific recommendations for each method to achieve optimal results.
- Freshly Roasted Beans are Key: Freshly roasted coffee beans will always yield a more flavorful and aromatic cup compared to pre-ground coffee. If you have the option, invest in a whole bean coffee and grind it just before brewing for the best results.
- Water Temperature Matters: While boiling water might seem ideal, it can actually scorch the coffee and lead to a bitter taste. Aim for water that’s just off the boil, around 200°F (93°C) for most methods.
- Experiment and Find Your Preference: Don’t be afraid to experiment with different grind sizes, coffee-to-water ratios, and brewing times to find what works best for your taste buds. The beauty of these methods lies in their flexibility, allowing you to customize your coffee experience.
Remember, these methods are designed to create a strong, concentrated coffee experience that rivals espresso in some aspects, but they may not replicate it exactly. However, with a little experimentation and the right technique, you can still enjoy a delicious and satisfying cup of coffee at home without needing a fancy espresso machine.
Easy Espresso-Based Drinks at Home: Embrace Your Inner Barista
Now that you’ve mastered brewing strong coffee and frothing milk at home, it’s time to explore some classic espresso-based drink options! Here are a few popular recipes to get you started:
1. The Classic Caffè Latte:
This creamy and comforting drink combines espresso with steamed milk. Here’s a simple recipe:
- Ingredients:
- 2 oz. strong brewed coffee (or espresso if you have it)
- 6 oz. frothed milk
- Optional: Flavored syrups, chocolate shavings, or spices for customization
- Instructions:
- Brew your strong coffee using your preferred method (French Press, AeroPress, etc.).
- Froth your milk using one of the methods described in the Bonus Section.
- Pour the hot coffee into a mug.
- Gently pour the frothed milk over the coffee, holding back the foam with a spoon if desired.
- Top with a dollop of the remaining milk foam and your desired flavorings (optional).
2. The Energizing Americano:
This drink is essentially espresso diluted with hot water, offering a stronger coffee flavor than a latte.
- Ingredients:
- 1 oz. strong brewed coffee (or espresso if you have it)
- 3 oz. hot water
- Instructions:
- Brew your strong coffee using your preferred method.
- Heat up some water (ideally around 195°F [90°C] but not boiling).
- Pour the hot water into a mug.
- Slowly pour your strong coffee over the hot water for a layered effect (optional).
3. The Delightful Cappuccino:
This drink features equal parts espresso, steamed milk, and milk foam, creating a rich and layered coffee experience.
- Ingredients:
- 1 oz. strong brewed coffee (or espresso if you have it)
- 4 oz. frothed milk
- Instructions:
- Brew your strong coffee using your preferred method.
- Froth your milk using one of the methods described in the Bonus Section.
- Pour the hot coffee into a mug.
- Gently pour half of the frothed milk into the mug.
- Spoon the remaining milk foam on top, creating a distinct layer.
These are just a few basic recipes to get you started. With a little creativity and exploration, you can experiment with different flavorings, milk alternatives, and coffee-to-milk ratios to create your own signature espresso-inspired drinks at home.
Frothing Milk Without a Steamer – Beyond the Basics
Since many espresso-based drinks like lattes and cappuccinos involve frothed milk, here’s a comprehensive guide on achieving froth without a dedicated steamer. We’ll explore classic methods and some innovative techniques gleaned from online resources:
Classic Frothing Techniques:
- Whisk Method: As previously mentioned, this method requires some effort but yields surprisingly good results. Heat your milk (whole milk froths best) in a small saucepan on the stovetop over medium heat. Don’t let it boil! Use a whisk to rapidly stir the milk, incorporating air to create small bubbles. As the milk heats and expands, keep whisking until it reaches a desired froth consistency, typically doubling in volume with a fine, silky texture.
- French Press Method: This method utilizes the plunging mechanism of your French Press to create frothed milk. Heat your milk in a separate container (avoiding scorching in the French Press) to around 140°F (60°C). Pour the hot milk into your French Press and plunge up and down rapidly for 30-60 seconds. This will incorporate air and create a light, frothy layer on top.
- Immersion Blender Method: If you have an immersion blender, it can be a handy tool for frothing milk. Heat your milk in a tall, narrow container to around 140°F (60°C). Insert the immersion blender head just below the surface of the milk and turn it on high. Slowly move the blender up and down to create a vortex and incorporate air. Stop once you achieve a desired froth consistency.
Innovative Techniques from the Web:
- Mason Jar Method: This internet favorite involves filling a clean mason jar halfway with cold milk (whole milk preferred). Tightly screw on the lid and shake vigorously for 30-60 seconds. The shaking creates friction and incorporates air, resulting in a layer of frothed milk on top. Be careful not to over-shake, as you might end up with whipped cream!
- Moka Pot “Hack”: If you own a Moka Pot, you can utilize the leftover steam pressure for a small amount of frothed milk. Fill the bottom chamber of your Moka Pot with a little water (around a tablespoon) and heat it on the stovetop. Once the pressure builds and coffee starts brewing, place a small, heat-resistant container filled with cold milk on top of the Moka Pot. The steam will help heat and froth the milk. Be careful with this method, as the Moka Pot will be hot.
- Battery-Powered Frothers: While not exactly a “manual” method, battery-powered frothers offer a convenient and affordable solution for frothing milk at home. These handheld devices typically have a small whisk attachment that spins rapidly, incorporating air into the milk to create froth.
Conclusion: Your Gateway to Strong Coffee at Home
The world of coffee is vast and exciting, and achieving a strong, flavorful brew doesn’t always require a hefty investment in an espresso machine. This guide has explored various methods for brewing a machine-free “espresso,” each with its own advantages and quirks.
Whether you’re drawn to the simplicity of the French Press, the portability of the AeroPress, the bold crema of the Moka Pot, or a quick improvised solution, there’s a method waiting to be explored. So, grab your favorite mug, experiment with the techniques outlined above, and discover the perfect cup of strong coffee to fuel your day, all without leaving your kitchen.
FAQs about Brewing Strong Coffee at Home (without an Espresso Machine)
Q: I don’t have an espresso machine, but I love strong coffee. Can I still brew something strong at home?
A: Absolutely! This guide explores several manual brewing methods that can create strong and flavorful coffee without relying on an espresso machine. The French Press, AeroPress, and Moka Pot are all fantastic options, each with its own advantages and brewing style.
Q: Which brewing method is the easiest for strong coffee?
A: The French Press is a great choice for beginners. It’s simple to use, requires minimal equipment, and allows you to control the brewing time for a strong cup.
Q: I want something strong with a crema layer, like espresso. Is that possible without a machine?
A: While achieving a true espresso crema is difficult without the high pressure of an espresso machine, the Moka Pot comes close. This stovetop pot brews a strong, concentrated coffee with a layer of crema on top.
Q: Can I still make lattes and cappuccinos without an espresso machine?
A: You can! While it won’t be exactly like what you get at a coffee shop, you can froth milk at home using a whisk, French Press, or immersion blender. This allows you to create delicious coffee drinks like lattes and cappuccinos at home.
Q: I’m interested in learning more about these brewing methods. Where can I find information?
A: This guide provides a basic overview, but there are many online resources with in-depth brewing instructions and tips for each method. A simple web search for “[brewing method name] coffee” will yield detailed guides and tutorials.

