How to Make Espresso Like a Pro: A Step-by-Step Guide

Are you tired of spending a fortune on fancy coffee shop espressos? 🤔 Imagine being able to create that perfect, velvety shot of espresso right in your own kitchen. The rich aroma, the luxurious crema, and that unbeatable flavor – all at your fingertips. But let’s face it, making espresso can seem daunting. The equipment, the techniques, the precision – it’s enough to make anyone’s head spin!

Don’t worry, we’ve got you covered. 👍 In this guide, we’ll demystify the art of espresso-making and show you how to become your very own barista. You’ll learn everything from choosing the right equipment to mastering the perfect pull. Whether you’re a coffee novice or a seasoned enthusiast looking to up your game, you’re in for a treat.

Get ready to embark on a journey that will transform your coffee experience. We’ll walk you through the essential equipment you’ll need, help you select and prepare the perfect beans, and guide you through the espresso-making process step by step. Plus, we’ll share troubleshooting tips for common issues and reveal secrets to enhance your espresso skills. So, grab your favorite mug and let’s dive into the wonderful world of espresso! ☕

How to Make Espresso

Essential Equipment for Making Espresso

To embark on your espresso-making journey, you’ll need the right tools. Let’s explore the essential equipment that will help you craft the perfect shot of espresso.

A. Choosing the right espresso machine

Your espresso machine is the cornerstone of your setup. When selecting one, consider these factors:

  • Budget: Espresso machines range from affordable to high-end
  • Skill level: Some machines are more user-friendly, while others offer advanced features
  • Capacity: Consider how many shots you’ll be making regularly

Here’s a comparison of different types of espresso machines:

TypeProsConsBest for
ManualFull control, portableRequires skill, labor-intensiveEnthusiasts
Semi-automaticBalance of control and convenienceLearning curveHome baristas
AutomaticConsistent results, easy to useLess control over variablesBeginners
Super-automaticOne-touch operationExpensive, less customizationConvenience-seekers

B. Selecting a quality grinder

A good grinder is crucial for achieving the perfect espresso. You’ll want to invest in a burr grinder, which offers:

  1. Consistent grind size
  2. Adjustable settings for fine-tuning
  3. Less heat generation, preserving coffee flavors

Look for grinders with conical or flat burrs, and consider whether you prefer stepped or stepless adjustment for precise control over your grind size.

C. Importance of a tamper

Your tamper is essential for creating the right resistance for water to flow through your coffee grounds. When choosing a tamper:

  • Ensure it fits your portafilter precisely
  • Look for a comfortable handle
  • Consider weight (heavier tampers can make consistent tamping easier)
  • Choose between flat or convex base (flat is more common)

D. Other helpful tools

To round out your espresso-making kit, consider these additional tools:

  1. Knock box: For easy disposal of used coffee grounds
  2. Milk pitcher: Essential if you plan to steam milk for lattes or cappuccinos
  3. Cleaning supplies: Brushes, detergents, and descaling solutions to maintain your equipment
  4. Shot glasses: For measuring and serving your espresso
  5. Digital scale: To weigh your coffee grounds for consistency

With these essential pieces of equipment, you’ll be well-equipped to start your espresso-making adventure. Remember, while having the right tools is important, practice and attention to detail are key to mastering the art of espresso. In the next section, we’ll delve into selecting and preparing your coffee beans, which is crucial for achieving that perfect shot.

How to Make Espresso

Selecting and Preparing Your Coffee Beans

Now that you have your essential equipment ready, it’s time to focus on the heart of your espresso: the coffee beans. The quality and preparation of your beans play a crucial role in creating that perfect shot of espresso you’re aiming for.

Choosing the Best Espresso Roast

When it comes to selecting the ideal beans for your espresso, you’ll want to look for a dark roast specifically labeled for espresso. These roasts are typically characterized by:

  • A rich, deep brown color
  • An oily surface
  • A bold, intense flavor profile

Here’s a quick comparison of different roast levels and their suitability for espresso:

Roast LevelColorFlavor ProfileSuitability for Espresso
LightLight brownAcidic, fruityNot recommended
MediumMedium brownBalanced, aromaticAcceptable
DarkDark brownBold, less acidicIdeal
Very DarkAlmost blackBitter, smokyGood, but can be overpowering

Proper Bean Storage Techniques

To maintain the freshness and flavor of your coffee beans, you need to store them correctly. Follow these tips to ensure your beans stay at their best:

  1. Use an airtight container to protect beans from oxygen exposure
  2. Store in a cool, dark place away from direct sunlight
  3. Keep beans away from heat sources and moisture
  4. Buy whole beans in small quantities to ensure freshness
  5. Avoid storing beans in the refrigerator or freezer, as this can introduce moisture

Grinding Your Beans to Perfection

The grind of your coffee beans is crucial for extracting the perfect espresso shot. You’ll want to aim for a fine, consistent grind that resembles table salt. Here’s how you can achieve the ideal grind:

  1. Invest in a quality burr grinder for consistent results
  2. Grind your beans just before brewing to preserve freshness and aroma
  3. Adjust your grinder settings to achieve the right fineness
  4. Aim for a grind that’s fine enough to create resistance, but not so fine that it clogs the portafilter

Remember, the grind size can significantly impact your espresso’s taste. If your shot is:

  • Too bitter: Your grind might be too fine
  • Too sour or weak: Your grind might be too coarse

Experiment with slight adjustments to your grind size until you achieve the perfect balance. With practice, you’ll develop a keen sense for the ideal grind that produces a rich, flavorful espresso with a beautiful crema on top.

By carefully selecting your beans, storing them properly, and grinding them to perfection, you’re setting the stage for an exceptional espresso experience. With these fundamentals in place, you’re ready to move on to the next crucial step: mastering the espresso-making process itself.

How to Make Espresso

Mastering the Espresso-Making Process

Now that you’ve prepared your equipment and selected the perfect beans, it’s time to dive into the heart of espresso-making. This process is where the magic happens, transforming those carefully chosen grounds into a rich, flavorful shot of espresso.

A. Dosing the right amount of coffee

The foundation of a great espresso starts with the right dose. You’ll want to use between 18-21 grams of coffee for a double shot, depending on your basket size and personal preference. Consistency is key here – invest in a precise scale to measure your doses accurately.

B. Tamping techniques for even extraction

Proper tamping ensures even water distribution through your coffee puck. Here’s a quick guide to perfecting your tamp:

  1. Distribute the grounds evenly in the portafilter
  2. Apply about 30 pounds of pressure
  3. Keep your wrist straight and elbow at 90 degrees
  4. Tamp once, firmly and evenly

Remember, consistency in your tamping technique is more important than the exact pressure applied.

C. Setting the ideal water temperature

Water temperature plays a crucial role in extraction. The ideal range is between 195°F and 205°F (90°C to 96°C). Many modern espresso machines allow you to adjust this, but if yours doesn’t, here’s a tip: run a blank shot before pulling your espresso to heat up the group head and portafilter.

D. Achieving the perfect extraction time

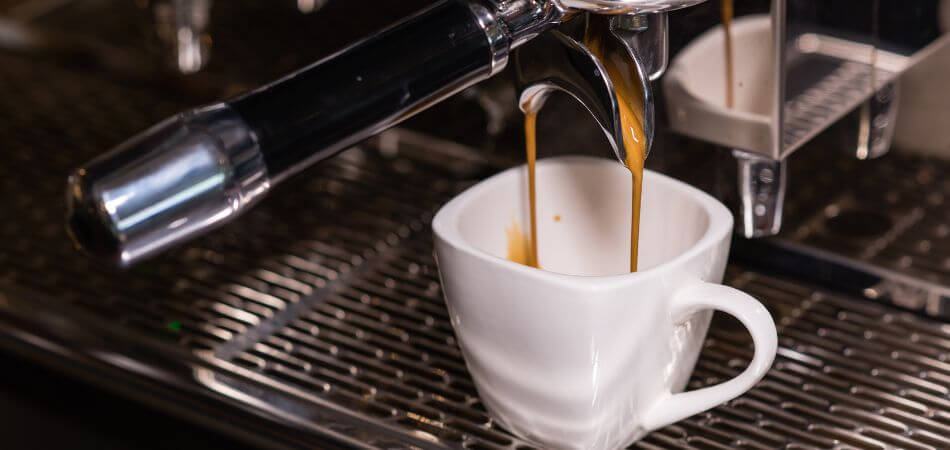
The golden rule for espresso extraction is the “25-30 second rule.” Your shot should take between 25-30 seconds from the moment you start the pump to when you achieve your desired volume (usually 1-2 oz for a double shot).

Here’s a breakdown of what to expect:

Time (seconds)StageWhat’s happening
0-5Pre-infusionWater saturates the puck
5-10First dropsDark, syrupy liquid appears
10-25Main extractionSteady stream, developing crema
25-30Blonde phaseShot lightens, time to stop

E. Recognizing a well-pulled shot

A perfectly pulled espresso shot is a work of art. Here’s what to look for:

  1. Appearance: Rich, reddish-brown crema with tiny bubbles
  2. Volume: 1-2 oz for a double shot
  3. Flow: Starts thick like warm honey, then becomes a steady stream
  4. Taste: Balanced flavors, not too bitter or sour

If your shot is running too fast, it might taste sour or weak. Too slow, and it could be bitter or burnt. Adjust your grind size accordingly – finer for slower extraction, coarser for faster.

By mastering these steps, you’re well on your way to creating café-quality espresso at home. Remember, perfecting your technique takes practice and patience. Don’t be discouraged if your first few attempts aren’t perfect – each shot is an opportunity to refine your skills and get closer to that ideal espresso.

How to Make Espresso

Troubleshooting Common Espresso Issues

Now that you’ve learned the basics of making espresso, it’s time to address some common problems you might encounter. Even experienced baristas face challenges, but with the right knowledge, you can troubleshoot and perfect your espresso-making skills.

A. Dealing with over-extraction

Over-extraction occurs when you extract too much from the coffee grounds, resulting in a bitter, harsh taste. Here are some signs and solutions for over-extraction:

  • Signs of over-extraction:
    • Bitter, astringent taste
    • Dark, muddy crema
    • Slow, syrupy flow

To fix over-extraction, try these adjustments:

  1. Coarsen your grind setting
  2. Reduce the extraction time
  3. Lower the water temperature slightly
  4. Decrease the dose of coffee grounds

B. Fixing under-extraction problems

Under-extraction happens when you don’t extract enough from the coffee grounds, leading to a sour, weak taste. Here’s how to identify and resolve under-extraction:

  • Signs of under-extraction:
    • Sour, acidic taste
    • Thin, pale crema
    • Fast, watery flow

To address under-extraction, consider these solutions:

  1. Use a finer grind setting
  2. Increase the extraction time
  3. Raise the water temperature slightly
  4. Increase the dose of coffee grounds

C. Addressing inconsistent shots

Inconsistency in your espresso shots can be frustrating. Here’s a table comparing factors that can lead to inconsistent shots and how to address them:

FactorProblemSolution
TampingUneven or inconsistent pressurePractice consistent tamping technique
DistributionClumps or uneven coffee bedUse a distribution tool or WDT method
Grind sizeVariations in particle sizeInvest in a quality grinder, clean regularly
DoseInconsistent amounts of coffeeUse a scale to measure precisely
Machine maintenanceFluctuating pressure or temperatureRegular cleaning and calibration

To improve consistency in your espresso shots:

  1. Develop a consistent workflow
  2. Keep detailed notes of your parameters
  3. Make one adjustment at a time
  4. Practice regularly to refine your technique

Remember, troubleshooting espresso issues is part of the learning process. By understanding these common problems and their solutions, you’ll be better equipped to diagnose and fix issues as they arise. With practice and patience, you’ll soon be pulling consistently delicious espresso shots.

Enhancing Your Espresso Skills

Now that you’ve mastered the basics of making espresso, it’s time to elevate your skills and take your coffee game to the next level. Let’s explore some advanced techniques that will help you become a true espresso connoisseur.

Experimenting with Different Bean Origins

One of the most exciting aspects of espresso-making is the vast world of coffee beans to explore. Each origin offers unique flavor profiles that can transform your espresso experience. Here’s a quick guide to help you navigate:

OriginFlavor ProfileBest For
EthiopiaFloral, fruity, wine-likeBright, complex shots
ColombiaNutty, chocolatey, balancedTraditional espresso
BrazilHeavy body, low acidity, caramel notesMilk-based drinks
GuatemalaSpicy, chocolatey, full-bodiedBold espresso shots

To truly appreciate these differences:

  1. Start with single-origin beans rather than blends
  2. Try a light roast and a dark roast from the same origin
  3. Keep notes on taste, aroma, and crema for each variety
  4. Adjust your grind and extraction time to optimize each bean’s potential

Perfecting Your Milk Frothing Technique

If you enjoy milk-based espresso drinks, mastering milk frothing is crucial. Here’s how you can elevate your technique:

  1. Always use cold, fresh milk for the best results
  2. Position the steam wand just below the milk’s surface to create a whirlpool effect
  3. Listen for a ‘tss-tss’ sound, indicating proper aeration
  4. Aim for a glossy, paint-like texture with tiny bubbles
  5. Tap the pitcher on the counter and swirl to eliminate large bubbles

Remember, different milk types require slightly different techniques. Whole milk is easiest to work with, while plant-based alternatives may need more practice to achieve the perfect texture.

Creating Latte Art Basics

Once you’ve perfected your espresso shot and milk frothing, it’s time to add that visual flair with latte art. Here are some tips to get you started:

  1. Begin with a heart shape, the foundation of most latte art designs
  2. Pour your milk from a height of about 3-4 inches above the cup
  3. Start pouring slowly in the center, then increase flow as you get closer to the surface
  4. When the cup is almost full, lower the pitcher close to the surface and pour faster
  5. To create the heart, pull through the design with a quick, straight line

Practice these techniques regularly, and you’ll soon be creating Instagram-worthy latte art. Remember, consistency is key in both your espresso shots and milk texture to achieve the best results.

By focusing on these advanced techniques – experimenting with bean origins, perfecting milk frothing, and creating latte art – you’ll take your espresso-making skills to new heights. Each cup you create will be a testament to your growing expertise and passion for the art of espresso.

Conclusion

Crafting the perfect espresso is an art that combines the right equipment, quality beans, and precise technique. By investing in essential tools like a reliable espresso machine and grinder, selecting fresh, high-quality beans, and mastering the intricacies of the brewing process, you can elevate your espresso-making skills to new heights. Remember, practice and patience are key as you navigate common issues and fine-tune your technique.

As you continue to hone your craft, don’t be afraid to experiment with different bean varieties, grind sizes, and extraction times. The world of espresso is rich and diverse, offering endless opportunities for exploration and refinement. Whether you’re a home barista or aspiring professional, embracing the journey of espresso-making will not only result in delicious drinks but also a deeper appreciation for the complexities of coffee. So, grab your portafilter, dial in your grinder, and embark on your espresso adventure – the perfect shot awaits!

FAQs

What is the basic method for making espresso for beginners?

To make espresso, start by grinding fresh coffee beans to a fine consistency. Next, tamp the grounds into the portafilter compactly. Insert the portafilter into your espresso machine and start the brew. The water should pass through the coffee grounds in about 20-30 seconds to produce a rich, concentrated espresso shot.

How do professional baristas prepare espresso?

Professional baristas follow these steps: Begin with freshly roasted coffee beans and grind them finely right before brewing. Tamp the grounds evenly in the portafilter to ensure uniform extraction. Brew the espresso with an espresso machine, targeting an extraction time of 25-30 seconds for optimal flavor.

Can you guide me through the process of using an espresso machine?

Preheat the machine.
Grind your coffee beans and measure the required amount.
Choose the correct filter basket and add the coffee grounds.
Tamp down the grounds firmly.
Secure the portafilter in place.
Start the machine to pull the espresso shot.
Optionally, steam milk if making a milk-based espresso drink, and add it to the espresso.

Sadaf Hasan

Sadaf Hasan

Articles: 125