How to Clean a Cuisinart Coffee Maker With Self-Clean Button: Simple Tips
How To clean a Cuisinart coffee maker with self-clean button, fill the reservoir with a solution of vinegar and water and press the self-clean button. Proceed by rinsing the coffee maker with water after the cycle completes.
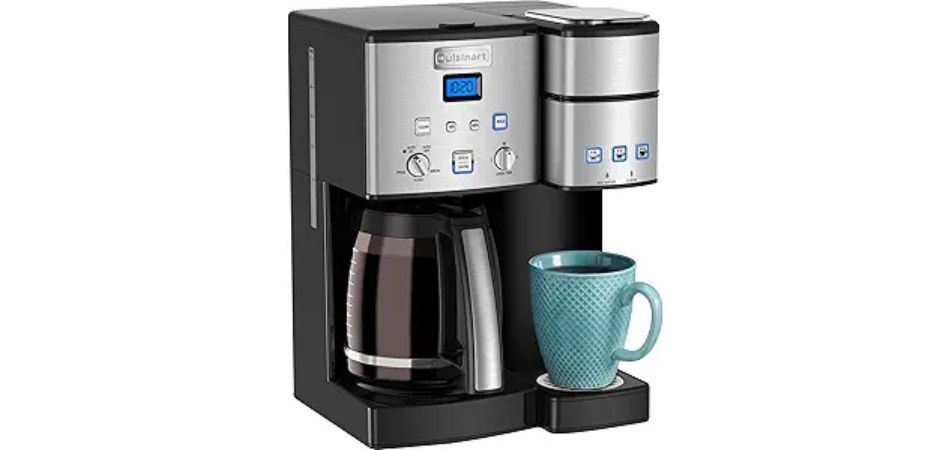
Regular cleaning of a Cuisinart coffee maker is paramount for ensuring its longevity and peak performance. With models often combining a full-size automatic drip and a single-serve coffee maker, understanding the nuances of how to clean a Cuisinart coffee maker with a self-clean button is essential. This process not only aids in preventing mineral buildup and corrosion but also in maintaining the machine free from calcium deposits and bacterial growth, which are critical for the coffee maker’s optimal function and the safety of its users.
This guide delves into the essential steps for daily maintenance and deep cleaning routines, including the use of the self-clean function, descaling Cuisinart coffee maker, and handling corrosion and loose components. By following the cleaning cycle recommended every three to six months, readers will learn to effectively reset their Cuisinart coffee maker, ensuring every cup of coffee is as perfect as the last.
Understanding Your Cuisinart Coffee Maker
Cuisinart offers a diverse range of coffee makers, each designed to cater to different coffee brewing needs and preferences. From the simple Automatic Drip Coffee Makers to more sophisticated Grind & Brew systems, Percolators, Pour-Over, and Home Espresso Machines, understanding the specific functions and features of your model is crucial for optimal use and maintenance.
Types of Cuisinart Coffee Makers
- Automatic Drip Coffee Makers: Ideal for everyday use, providing consistent, programmable brewing.
- Grind & Brew: Integrates grinding and brewing in a single process for ultra-fresh coffee.
- Percolators: Known for stronger, more robust coffee.
- Pour-Over: Delivers precise control over pouring and temperature.
- Home Espresso Machines: For espresso lovers, offering features like milk frothing and multiple shot capabilities.
Initial Setup and Safety
- Read the Instruction Booklet: Always start by thoroughly reading the provided instruction manual to familiarize yourself with safety guidelines and specific operating instructions.
- Avoid Hot Surfaces: Be cautious of hot surfaces including the carafe, heating plate, and steam vents.
- Electrical Safety: Ensure the cord and plug remain dry and are kept away from water sources to prevent electric shock.
Features of Popular Models
- Cuisinart 12-Cup Coffee Maker (DCC-3200): Features include a programmable timer, temperature control, and a self-clean function. It requires an initial setup that includes inserting a charcoal water filter and setting the Auto-On/Auto-Off times.
- Cuisinart Single-Serve Coffeemaker: Utilizes convenient capsules with options for different brew sizes. Simply add water, select a capsule, place a mug, and choose your desired brew size.
- Water Filtration: Both models incorporate a charcoal water filter to eliminate chlorine, bad tastes, and odors from tap water, enhancing the flavor of your coffee.
Maintenance Tips
- Regular Cleaning: Essential for performance and longevity. Includes washing removable parts and descaling to remove mineral buildup.
- Descaling Frequency: Recommended every 3 to 6 months, depending on water hardness and machine usage.
Warranty and Replacement Parts
- Three-Year Limited Warranty: Covers manufacturer’s defects. Always use Cuisinart replacement parts like the Cuisinart® Gold-Tone Commercial-Style Filter or standard cone-shaped paper filters to ensure compatibility and avoid damage.
Understanding these aspects of your Cuisinart coffee maker not only helps in achieving the best coffee brewing experience but also ensures the machine operates safely and efficiently for years to come. Regular maintenance and adherence to operational guidelines are key to enjoying delicious coffee every day.
Daily Cleaning Routines
Disassembly and Basic Cleaning
- Disassemble the Coffee Maker: Begin by removing all removable parts including the carafe, brew basket, and any other components specified in the instruction manual.
- Rinse and Dry Components: Thoroughly rinse these parts under running water. Use a soft brush or sponge to remove coffee residue. Dry all components with a lint-free microfiber cloth to prevent mineral deposits from forming.
Cleaning the Carafe and Filters
- Carafe Cleaning: Clean the carafe and its lid either in warm, soapy water or place them in the dishwasher if they are dishwasher-safe. Ensure they are completely dry before reassembling.
- Filter Disposal: After each use, discard used coffee grounds and paper filters immediately to prevent mold and bacteria growth.
External Surface Maintenance
- Wipe Down Surfaces: Using a damp dishcloth and a mild soap solution, gently wipe down the external surfaces of the coffee maker. Pay special attention to the area around the base and the heating plate to ensure no coffee or water stains remain that could affect performance.
Special Cleaning for Espresso Machines
- Backflush Group Heads: For models with espresso group heads, perform a backflush with clean water each night.
- Replace Worn Gaskets: Check and replace the espresso machine gaskets every six months or as needed to prevent leaks and maintain pressure integrity.
Grinder and Water System Care
- Grinder Maintenance: Keep grinder burrs sharp by replacing them every 6 to 18 months, depending on usage. A shrill sound or slow grinding are indicators of dull burrs.
- Water Treatment: Maintain your water treatment system regularly to ensure the best taste of your coffee and to protect your machine from scale buildup.
Deep Cleaning with Vinegar Solution
- Prepare Vinegar Solution: Mix a 50-50 solution of white distilled vinegar and water and fill the coffee maker’s reservoir.
- Brew and Soak: Position a filter in the basket and start the brewing cycle. Midway, turn off the coffee maker to let the vinegar solution soak in the carafe and reservoir for 30 to 60 minutes.
- Complete Cycle and Rinse: Turn the coffee maker back on to finish the cycle. Discard the vinegar solution and filter. Then, run at least two full cycles with fresh water to remove any vinegar residue.
Regular Exterior and Accessory Cleaning
- Daily Surface Cleaning: Wipe down the coffee maker and coffee pot daily with a clean cloth after use.
- Post-Cleaning Practices: Always leave the lid of the coffee maker open after brewing and cleaning to allow it to dry out completely, preventing mold and odor buildup.
By adhering to these daily cleaning routines, you ensure that your Cuisinart coffee maker operates efficiently, providing fresh, delicious coffee while prolonging the lifespan of the machine. Regular maintenance not only prevents potential equipment problems but also ensures that your coffee maker remains hygienic and safe to use.
Preparing Your Coffee Maker for Deep Cleaning
Disassembly and Initial Cleaning
- Unplug the Coffee Maker: Ensure safety by unplugging the unit before any cleaning process begins.
- Remove Components: Carefully disassemble the coffee maker by removing the filter basket, carafe, and lid.
Washing and Drying
- Wash with Soapy Water: Use warm, soapy water to thoroughly clean the removed components. This helps in removing coffee oils and residue effectively.
- Rinse Thoroughly: After washing, rinse all parts well to ensure no soap residue remains.
- Dry with Microfiber Cloth: Use a microfiber cloth to dry the components. This type of cloth is effective in preventing lint from sticking to the surfaces.
Vinegar Solution for Deep Cleaning
- Prepare Vinegar Solution: Mix a solution of 50% white distilled vinegar and 50% water. Fill the coffee maker’s reservoir with this solution.
- Start Brewing Cycle: Begin the brewing process and allow the solution to brew halfway. Then, turn off the coffee maker to let the solution sit.
- Soaking Time: Let the vinegar solution soak in the carafe and reservoir for 30 to 60 minutes to effectively loosen mineral deposits and other buildups.
Completing the Cleaning Cycle
- Finish Brewing: After the soaking period, turn the coffee maker back on to complete the brewing cycle.
- Discard Vinegar Solution: Once the cycle is complete, discard the used filter and the vinegar solution.
- Flush with Clean Water: Run fresh water through the coffee maker by filling the reservoir with clean water and running a full brewing cycle. Repeat this process one or two more times to ensure all vinegar residues are removed.
By following these steps, you prepare your Cuisinart coffee maker thoroughly for a deep cleaning session, ensuring that all parts are properly cleaned and ready for further maintenance or immediate use. This process helps in extending the lifespan of your coffee maker and maintaining the quality of your coffee.
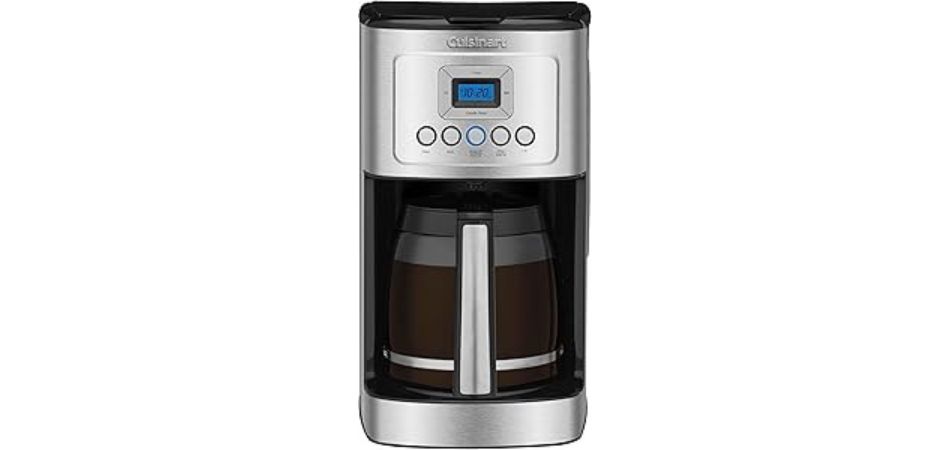
The Self-Clean Function
How to Utilize the Self-Clean Feature
Step-by-Step Guide to Activating the Self-Clean Function
- Prepare the Cleaning Solution: Mix 1/3 white vinegar with 2/3 water and fill the water reservoir to capacity.
- Start the Cleaning Cycle: Press the Self-Clean button and turn on the coffeemaker.
- Complete the Cycle: Allow the cycle to run its course; typically, one cycle is sufficient to clean the coffee maker thoroughly.
After Cleaning Care
- Rinse the Coffee Maker: After the self-clean cycle, it’s crucial to run a cycle of fresh, cold water through the unit to remove any lingering vinegar taste.
- Repeat if Necessary: Depending on the mineral buildup, you may need to repeat the cleaning process to ensure all residues are removed.
Understanding the Cleaning Process
The self-clean function is specifically designed to tackle calcium deposits and other mineral buildups that can affect the coffee maker’s performance. The feature adjusts the temperature based on the water’s mineral content, ensuring effective cleaning. Regular use of the self-clean function is essential as it prevents the buildup of minerals and oils that can alter the taste of your coffee and potentially harm the machine.
Maintenance Tips
- Regular Cleaning Schedule: To prevent the accumulation of deposits, run the self-clean function every three months or as indicated by the machine’s clean light.
- Monitor for Signs of Buildup: If the clean light flashes, it’s a prompt that cleaning is due. Ignoring these signs can lead to harder-to-clean residue and reduced efficiency of the heating element.
By following these guidelines, you can ensure your Cuisinart coffee maker remains in optimal condition, providing the best possible flavor and extending the lifespan of the machine.
Deep Cleaning Without a Self-Clean Feature
Vinegar and Water Solution Method
To effectively descale and deep clean your Cuisinart coffee maker without a self-clean feature, follow these detailed steps using a simple vinegar and water solution:
- Prepare the Solution: Mix equal parts of distilled white vinegar and water to fill the coffee maker’s water reservoir.
- Begin the Cleaning Cycle: Place a paper filter in the basket, set the pot on the burner, and start the brew cycle.
- Pause for Soaking: Once half of the solution has cycled through, turn off the coffee maker. Allow the remaining solution to sit in the machine for about 30 minutes to loosen mineral deposits.
- Complete the Cycle: Turn the coffee maker back on to finish the brewing process. Discard the vinegar solution once the cycle is complete.
- Rinse Thoroughly: Replace the paper filter and run the brew cycle at least twice with fresh water to ensure all vinegar residues are removed, leaving no aftertaste.
Using Commercial Descaling Solutions
If you prefer not to use vinegar, commercial descalers are an effective alternative for deep cleaning:
- Choose a Descaler: Select a descaling solution suitable for coffee makers, such as Affresh, Bar Keepers Friend, or Brew Rite.
- Follow Manufacturer Instructions: Dilute the descaling solution according to the manufacturer’s directions and fill the water reservoir.
- Run the Descaling Cycle: Start the coffee maker and let it run a complete cycle to ensure the solution cleanses all internal components.
- Flush the System: After descaling, run fresh water through the system at least twice to remove any chemical residues.
Alternative Cleaning Solutions
For those who prefer natural cleaning agents or have sensitivities to vinegar, consider these alternatives:
- Baking Soda Solution: Dissolve a quarter cup of baking soda in a pot of warm water. Use this mixture to fill the reservoir and run a complete brew cycle. Follow with two to three cycles of plain water.
- Lemon Juice Method: Use a mixture of equal parts lemon juice and water to fill the reservoir and proceed as with the vinegar method.
Care for Grinder Components
If your coffee maker includes a grinder:
- Avoid Moisture: Do not use water to clean the grinder. Moisture can damage the grinder burrs.
- Regular Wiping: Clean the grinder components regularly with a dry, soft cloth to remove coffee particles and oil residues.
By following these procedures for deep cleaning your Cuisinart coffee maker without a self-clean feature, you ensure optimal performance and extend the lifespan of your machine. Regular maintenance, including monthly descaling, is crucial for keeping the coffee maker in excellent condition and ensuring the best possible taste for your coffee.

Decalcifying Your Coffee Maker
Decalcifying, also known as descaling, is essential for removing mineral buildup and coffee oil residue from your Cuisinart coffee maker. This process not only enhances the flavor of your coffee but also extends the lifespan of your machine. Depending on the hardness of your water and frequency of use, it is recommended to descale your coffee maker every one to three months.
Vinegar and Water Method
- Prepare the Solution: Mix one part distilled white vinegar with two parts water.
- Fill the Reservoir: Pour the vinegar solution into the water reservoir of your coffee maker.
- Run the Cleaning Cycle: Start a brewing cycle without coffee grounds. Midway through, turn off the coffee maker to allow the solution to sit and break down the mineral deposits.
- Complete the Cycle and Rinse: Turn the coffee maker back on to finish the cycle. Afterwards, run two to three cycles with just water to remove any vinegar taste.
Baking Soda Method
- Solution Preparation: Dissolve one part baking soda in four parts warm water.
- Fill and Brew: Add this solution to the water reservoir and begin a brewing cycle.
- Rinse Thoroughly: After completing the cycle with the baking soda solution, run several cycles with plain water to ensure all residue is flushed out.
Commercial Descaling Solutions
- Select a Suitable Descaler: Choose a descaling solution that is compatible with coffee makers.
- Follow Manufacturer’s Instructions: Dilute the solution according to the instructions provided on the package.
- Descaling Cycle: Run the descaling solution through a brewing cycle. Pause halfway to let it soak and then complete the cycle.
- Rinse Well: It is crucial to flush out the system with fresh water after using commercial descalers to ensure no chemical residue remains.
Regular Maintenance Tips
- Use Filtered Water: To minimize mineral buildup, use filtered water for brewing your coffee.
- Monitor for Signs of Buildup: Regularly check for any signs of mineral deposits and initiate a cleaning cycle as needed.
- Adhere to Cleaning Frequency: Maintain a regular descaling schedule based on your coffee maker’s usage and water hardness.
By adhering to these descaling methods and maintenance tips, you can ensure that your Cuisinart coffee maker remains in excellent working condition, providing you with great-tasting coffee every time. Regular descaling is crucial for the longevity and efficiency of your coffee machine.
Cleaning the Carafe
Regular Maintenance of the Carafe
Step-by-Step Daily Cleaning
- Rinse After Use: Immediately after each use, rinse the carafe and lid with warm water to remove any remaining coffee residue.
- Air Dry: Allow all parts to air dry completely before reassembling to prevent moisture buildup, which can lead to mold.
Weekly Deep Cleaning
- Soapy Wash: Clean the carafe and lid inside and out using hot soapy water and a dish brush, sponge, or cloth.
- Rinse Thoroughly: Ensure all soap is removed by rinsing the carafe and lid under warm water.
- Dry Completely: After washing, dry the carafe and lid thoroughly with a clean cloth or allow them to air dry.
Deep Cleaning Techniques for Stubborn Residues
Vinegar and Water Method
- Prepare the Solution: Mix a 50-50 solution of white distilled vinegar and water.
- Fill and Soak: Pour the solution into the carafe, let it soak for 30-60 minutes to dissolve mineral deposits and oils.
- Finish and Flush: Complete the cycle by rinsing the carafe several times with clean water to remove any vinegar smell.
Baking Soda Cleaning
- Create Mixture: Add one cup of baking soda to the carafe.
- Pour Boiling Water: Fill the carafe with boiling water and let it sit for approximately 90 minutes.
- Scrub and Rinse: Use a brush or cloth to scrub the carafe, then rinse it thoroughly with clean water.
Dishwasher Tab Method (For Stainless Steel Carafes)
- Boil Water: Heat water in a kettle.
- Add Dishwasher Tab: Place a dishwasher tab in the carafe.
- Pour and Soak: Pour the boiling water over the dishwasher tab in the carafe. Let it soak for 30 minutes.
- Scrub if Needed: After soaking, scrub the carafe if necessary, then rinse well.
Alternative Cleaning Solutions
Rice and Sudsy Water Method
- Prepare Sudsy Water: Fill the carafe with warm, soapy water.
- Add Rice: Add a handful of rice to the carafe.
- Swirl to Clean: Swirl the mixture vigorously to scrub the interior surfaces with the rice acting as a gentle abrasive.
- Rinse and Dry: Empty the carafe, rinse thoroughly, and dry.
Washing Soda or Dishwasher Detergent
- Add Cleaning Agent: Place 1/4 cup of washing soda or dishwasher detergent into the carafe.
- Fill with Boiling Water: Pour nearly boiling water into the carafe, filling it.
- Soak: Allow the mixture to sit for 30 minutes to an hour.
- Scrub and Rinse: Use a dish brush or cloth to wipe away any stains, rinse well, and allow to dry completely.
Ongoing Care Tips
- Empty the Carafe: Always empty the carafe after each use to prevent buildup that can affect the taste of your coffee.
- Exterior Wiping: Regularly wipe down the exterior of the coffee maker and carafe with a clean cloth to maintain its appearance and functionality.
Maintaining the Exterior and Accessories
Regular Exterior Maintenance
- Daily Wiping:
- After each use, wipe down the exterior of your Cuisinart coffee maker with a damp cloth to remove any spills, stains, or dust.
- Focus on areas prone to coffee spills or where dust may collect, ensuring a clean and hygienic surface.
- Weekly Deep Cleaning:
- Disassemble removable parts and wash them with warm, soapy water. Dry thoroughly to prevent mold or bacterial growth.
- For the coffee maker’s body, use a soft cloth and warm soapy water. Avoid using scouring pads or abrasive cleaners to prevent scratches.
- Special Attention to Stainless Steel Surfaces:
- Use melamine foam sponges or Wenol Blue polish for serious cleaning of dulled or water-stained stainless steel surfaces.
- For a streak-free shine, apply well vodka with a microfiber cloth, which effectively dissolves coffee and greasy stains.
Handling and Usage Precautions
- Hot Surfaces: Always use handles and knobs when handling the coffee maker to avoid direct contact with hot surfaces.
- Electrical Safety:
- Ensure the coffee maker is unplugged when not in use and before cleaning.
- Avoid placing the cord, plug, or base unit in water or other liquids.
- Regularly check electrical components for signs of wear or damage.
Water Quality Management
- Use of Distilled Water:
- Fill the coffee maker with bottled distilled water to reduce wear and tear and prevent mineral buildup.
- If you live in a hard water area, consider installing a water-softening system to extend the cleanliness and functionality of your coffee maker.
Care for Non-Dishwasher Safe Parts
- Manual Cleaning:
- Wash the electrical base, power cord, and plug manually as they are not dishwasher-safe.
- Use a slightly damp cloth to clean these parts and dry them immediately to avoid any risk of electrical hazards.
Weekly and Monthly Cleaning Routines
- Weekly Surface Cleaning:
- Monthly In-Depth Cleaning:
- Empty the coffee bean container and clean it to prevent oil build-up and decomposition, which can lead to hard-to-clean spots and affect the flavor of your coffee.
By adhering to these maintenance routines and handling precautions, you can ensure that your Cuisinart coffee maker not only looks good but also functions efficiently for years to come. Regular care of the exterior and accessories plays a crucial role in the overall performance and longevity of your coffee maker.
Conclusion
Through meticulous guidance and detailed instructions, this ultimate guide has equipped readers with comprehensive knowledge on maintaining, cleaning, and ensuring the longevity of their Cuisinart coffee maker. From understanding the unique features of different models to adopting daily routines and handling deep cleaning procedures, we’ve covered essential practices that contribute to both the performance of the coffee maker and the quality of the coffee it brews. By emphasizing the significance of regular maintenance, especially the use of the self-clean function and the importance of descaling, we’ve highlighted how simple, consistent care can enhance your coffee experience.
Reflecting on the broader implications, adhering to these maintenance tips not only extends the life of your Cuisinart coffee maker but also plays a crucial role in safeguarding the health and safety of its users. Clean machinery significantly reduces the risk of bacterial growth and ensures the best possible taste of your coffee, reinforcing the importance of routine care. As readers implement these practices, they contribute to a culture of responsible and informed appliance use, underlining the undeniable link between thorough maintenance and the enjoyment of perfect, delicious coffee with every brew.
FAQs
What are the steps to clean a Cuisinart coffee maker using the self-clean feature?
To clean your Cuisinart coffee maker with the self-clean button, first make sure to empty any remaining water from the water reservoir. Mix one-third distilled white vinegar with two-thirds water and fill the reservoir with this solution. Press and hold the clean button to initiate the cleaning cycle. The clean indicator will begin to flash, signaling that the coffee maker is in clean mode.
How do I activate the self-clean function on my coffee maker?
To use the self-clean function on your coffee maker, typically you will need to fill the water reservoir with a cleaning solution (often a vinegar and water mixture), and then press and hold the self-clean button. Refer to your specific coffee maker’s manual for detailed instructions, as the process can vary by model.
What is the process for descaling my Cuisinart coffee maker?
Descaling your Cuisinart coffee maker usually involves filling the water reservoir with a descaling solution, which can be a specific descaling product or a mixture of white vinegar and water. After adding the solution, you would run the coffee maker’s cleaning cycle. It’s important to consult your coffee maker’s instruction manual for the recommended descaling procedure.
How much vinegar should I use to clean a 12-cup coffee maker?
For cleaning a 12-cup coffee maker, which is capable of making 60 ounces of coffee, you should use an equal mixture of vinegar and water. This means you’ll need 30 ounces of distilled white vinegar mixed with 30 ounces of water to thoroughly clean the machine.

