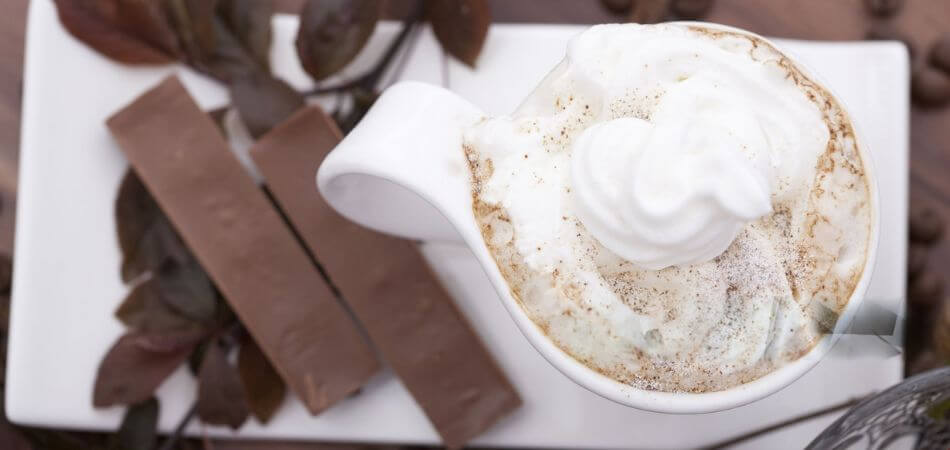
Best Homemade Vanilla Coffee Creamer with just 3 ingredients!
Imagine waking up to the aroma of freshly brewed coffee, pouring in a splash of rich, creamy vanilla goodness, and taking that first warm, comforting sip. Sounds perfect, right? But what if I told you that your store-bought coffee creamer might contain artificial flavors, preservatives, and unhealthy additives?
That’s why making your own homemade vanilla coffee creamer is a game-changer! Not only is it healthier, but it’s also customizable, cost-effective, and incredibly easy to make with just a few simple ingredients.
In this article, we’ll cover:
✔ Why homemade creamer is better than store-bought
✔ The simple ingredients you’ll need
✔ A step-by-step recipe to make your own creamy, vanilla-infused delight
✔ Storage tips and fun flavor variations
✔ Answers to common FAQs
Ready to upgrade your coffee game? Let’s dive in! ☕✨
Why Make Your Own Vanilla Coffee Creamer?
Store-bought coffee creamers might be convenient, but have you ever checked the ingredients list? Many commercial brands contain artificial flavors, hydrogenated oils, and preservatives that aren’t exactly the healthiest choices. That’s why making your own homemade vanilla coffee creamer is a much better option!
Here’s why you’ll love it:
1. Healthier Ingredients
When you make it yourself, you control what goes in—no artificial additives, no chemicals, just real, wholesome ingredients.
2. Customizable to Your Taste
Prefer it sweeter? Want it extra creamy? Need a dairy-free version? You’re in charge! You can tweak the recipe to suit your dietary needs and taste preferences.
3. Cost-Effective
A bottle of high-quality store-bought creamer can be pricey, but making your own costs just a fraction of the price—and you get more for your money!
4. Diet-Friendly Options
Whether you’re following a keto, dairy-free, or sugar-free diet, you can adjust the ingredients to match your lifestyle without sacrificing taste.
5. Quick and Easy to Make
With just a few ingredients and five minutes, you can create a delicious, creamy vanilla coffee creamer at home—no special skills required!
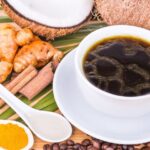
Simple Ingredients for the Best Homemade Creamer
One of the best things about making your own homemade vanilla coffee creamer is how simple the ingredients are. No hard-to-pronounce chemicals—just real, wholesome ingredients that you probably already have in your kitchen!
Base Ingredients
These are the essentials you’ll need to create a creamy, flavorful coffee creamer:
| Ingredient | Purpose in Creamer |
|---|---|
| Milk (whole, almond, oat, or coconut) | Forms the liquid base of the creamer |
| Heavy cream (or dairy-free alternative) | Adds richness and a smooth, creamy texture |
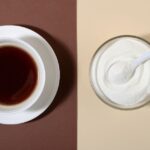
| Sweetener (sugar, honey, maple syrup, or sugar-free alternatives) | Balances flavors and enhances sweetness |
| Pure vanilla extract or vanilla bean | Provides that classic vanilla taste |
Optional Add-ins for Extra Flavor
Want to add a little twist to your creamer? Try these fun add-ins!
| Add-in | Flavor Enhancement |
|---|---|
| Cinnamon or nutmeg | Adds warmth and spice |
| Caramel or hazelnut extract | Creates a sweet, nutty flavor |
| Almond extract | Enhances the vanilla with a subtle almond note |
| Pumpkin spice | Perfect for fall-inspired coffee |
| Cocoa powder | Turns it into a vanilla-chocolate creamer |
With these ingredients in hand, you’re ready to make a delicious homemade vanilla coffee creamer that will take your coffee to the next level.
Step-by-Step Recipe for Homemade Vanilla Coffee Creamer
Now that you have all your ingredients ready, let’s make your own homemade vanilla coffee creamer in just a few simple steps!
Ingredients
| Ingredient | Measurement |
|---|---|
| Milk (whole, almond, oat, or coconut) | 1 cup |
| Heavy cream (or dairy-free alternative) | 1 cup |
| Sweetener (sugar, honey, maple syrup, or sugar substitute) | 3 tbsp (adjust to taste) |
| Pure vanilla extract | 1 tbsp |
| Vanilla bean (optional, for richer flavor) | 1 pod (scraped) |
Instructions
1️⃣ Heat the Milk & Cream:
- In a small saucepan, combine the milk and heavy cream.
- Warm over low heat, stirring occasionally. Do not boil—just heat until warm.
2️⃣ Add the Sweetener:
- Stir in the sweetener of your choice until fully dissolved.
3️⃣ Infuse the Vanilla Flavor:
- Add pure vanilla extract or scraped vanilla bean for that deep, aromatic vanilla taste.
4️⃣ Simmer & Blend:
- Let the mixture simmer for 2-3 minutes, stirring occasionally. This helps blend the flavors together.
5️⃣ Cool & Store:
- Remove from heat and let it cool to room temperature.
- Pour into an airtight container (like a mason jar or glass bottle).
6️⃣ Refrigerate & Enjoy:
- Store in the fridge for up to one week.
- Shake well before each use, as natural ingredients may separate.
How to Make Vanilla Coffee Creamer Without Condensed Milk
Craving that rich, creamy vanilla coffee creamer, but don’t want to use condensed milk? No worries, I’ve got you covered! You can easily make a smooth and flavorful homemade vanilla creamer without it. Plus, it’s quick, customizable, and free of the extra sugar and preservatives that come with store-bought options.
What You’ll Need:
- 1 cup milk (Whole, almond, oat, or your favorite milk choice)
- 1 cup heavy cream (or dairy-free cream if preferred)
- 3 tablespoons sweetener (maple syrup, honey, or any sweetener you like)
- 1 tablespoon pure vanilla extract (or the seeds from 1 vanilla bean for a richer flavor)
Instructions:
- Heat the Dairy: Start by pouring the milk and heavy cream into a small saucepan. Place it on the stove over medium-low heat and gently warm it up, stirring occasionally. You want it to be warm but not boiling.
- Sweeten It Up: Once the milk and cream are heated, stir in your sweetener. Maple syrup or honey works beautifully, but if you’re looking for a sugar-free version, try stevia or monk fruit sweetener. Keep stirring until the sweetener has completely dissolved.
- Vanilla Magic: Add the vanilla extract to the mixture. If you’re feeling fancy, scrape the seeds from a vanilla bean instead—this gives the creamer a deeper, more aromatic flavor.
- Simmer & Blend: Let the mixture simmer for about 2–3 minutes, stirring occasionally. If you’re adding any extra flavors like cinnamon or nutmeg, this is the time! Then, remove the pan from the heat.
- Cool & Store: Allow your homemade vanilla creamer to cool, and then pour it into a bottle or jar. Store it in the fridge, and it’ll stay fresh for up to a week. Just be sure to shake it up before each use, since the ingredients may naturally separate over time.
Why Skip the Condensed Milk?
Condensed milk can make coffee creamers super sweet and thick, but it’s not necessary to achieve that creamy texture and delicious flavor. This recipe uses simple ingredients that give you more control over sweetness and creaminess, without the added sugars or preservatives found in condensed milk.
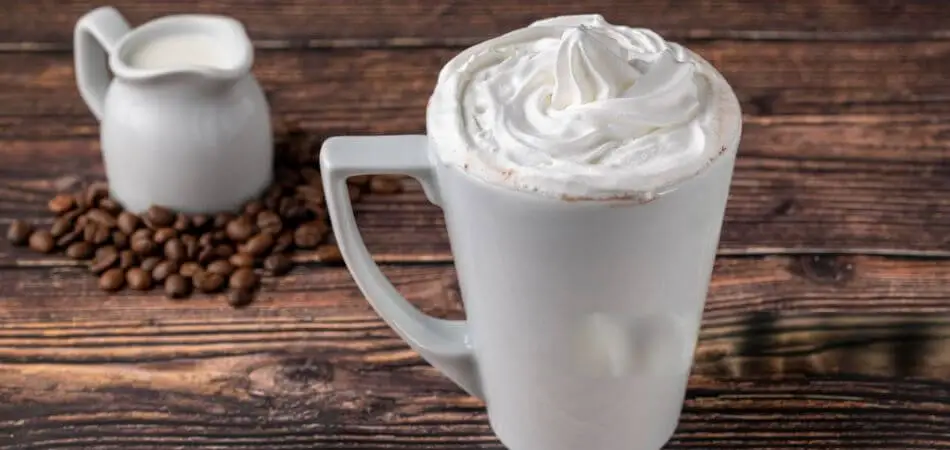
Homemade Coffee Creamer With just Milk
Sometimes, all you need is a little bit of milk to make your coffee perfectly creamy. If you’re craving a smoother cup of coffee but don’t want to mess with a ton of ingredients, you can make a simple and delicious homemade coffee creamer with just milk. It’s easy, quick, and you can customize it to suit your tastes!
What You’ll Need:
- Milk – Whether you prefer whole milk, almond milk, or oat milk, you can use whatever type of milk you have on hand! Milk forms the base of your creamer and gives it that smooth, creamy texture.
- Sweetener (optional) – If you like your coffee on the sweeter side, you can add a little sugar, honey, or maple syrup. Just be sure to adjust based on your preference.
How to Make It:
- Pour your milk into a small saucepan. If you’re using non-dairy milk, that works too!
- Gently heat the milk over medium-low heat. Keep an eye on it to avoid it boiling over.
- If you want a sweet creamer, stir in your sweetener of choice. Start with a teaspoon and taste as you go. You can always add more!
- Once the milk is heated and any sweetener is dissolved, you’re done! Pour it into your coffee, stir, and enjoy your creamy, dreamy cup of coffee.
Why It Works:
The beauty of this homemade coffee creamer is its simplicity. Milk, especially when warmed, adds a rich and velvety texture to coffee. By adding a little sweetness, it mimics the taste of the store-bought creamers without all the added chemicals and preservatives.
A Few Fun Variations:
- Vanilla Twist: Add a drop of vanilla extract for a sweet, comforting flavor.
- Cinnamon Spice: Sprinkle a bit of cinnamon or nutmeg into your milk as it heats up for a warm, cozy vibe.
- Extra Creamy: For a richer version, use half-and-half or a combination of milk and heavy cream!
Storage and Shelf Life Tips
Now that you’ve made a delicious batch of homemade vanilla coffee creamer, you’ll want to store it properly to maintain its flavor and freshness.
Proper Storage
- Airtight container: The best way to store your homemade coffee creamer is in an airtight container like a mason jar or glass bottle. This helps prevent the creamer from absorbing any unwanted odors from your fridge.
- Refrigeration: Always store your creamer in the refrigerator to keep it fresh for the longest time possible. It’s important to keep it cool to maintain its smooth texture and flavor.
Shelf Life
- Your homemade vanilla coffee creamer will last up to 7 days in the fridge. Be sure to check the expiration date of any dairy or non-dairy ingredients you used.
- As time goes on, the natural ingredients may begin to separate, so give it a good shake before each use.
Signs It’s Time to Make a Fresh Batch
- Smell: If it starts to smell sour or off, it’s time to make a new batch.
- Texture: If it becomes lumpy or the texture changes drastically, it may have gone bad.
- Taste: If it no longer tastes as fresh or sweet, don’t risk it—make a new one!
Taking these simple steps will help ensure that your homemade creamer stays fresh and delicious throughout the week!
Creative Variations and Flavor Twists
While a classic homemade vanilla coffee creamer is always a crowd-pleaser, why not get a little creative and experiment with different flavors? There are so many ways to personalize your creamer to match your taste or the season. Let’s explore some fun variations and flavor twists that will elevate your coffee even more!
1. French Vanilla Creamer
If you prefer a richer and decadent vanilla flavor, a French vanilla version is perfect for you! Simply add an extra tablespoon of vanilla extract and a pinch of cinnamon to deepen the flavor and give it a slightly spiced warmth. It’s like a cozy hug in a cup!
2. Dairy-Free/Vegan Version
For a dairy-free or vegan alternative, you can easily swap the heavy cream and milk for your favorite non-dairy options like almond milk, oat milk, or coconut milk. Coconut cream is a great substitute for heavy cream, giving it a rich and creamy texture. This version is perfect for those who prefer plant-based options!
3. Keto-Friendly Creamer
If you’re following a keto diet, you can enjoy a sugar-free vanilla coffee creamer by using heavy cream as the base and a sugar substitute like monk fruit or stevia. This low-carb version will give you all the creamy goodness without the sugar!
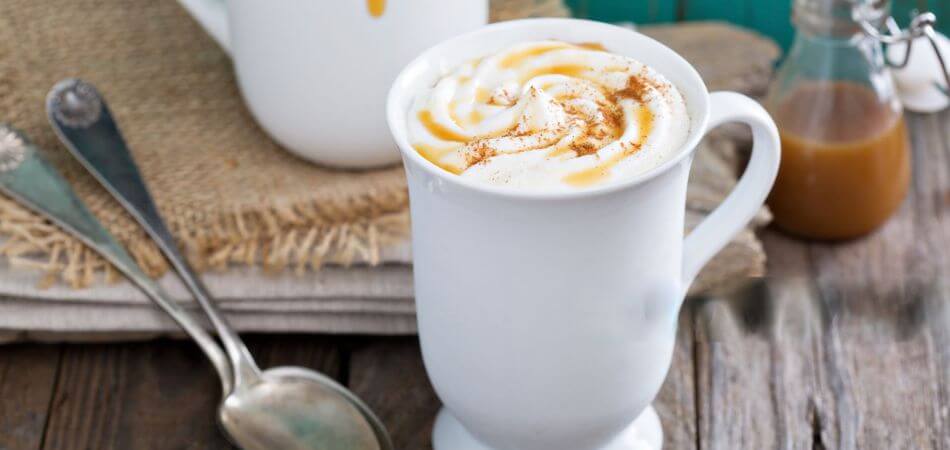
4. Vanilla-Caramel Twist
Add a touch of caramel syrup (or caramel extract) to your vanilla creamer for a sweet, indulgent treat. This twist is perfect if you love the combination of vanilla and caramel flavors, bringing a little extra sweetness to your coffee.
5. Vanilla-Hazelnut
If you’re a fan of hazelnut-flavored coffee, try adding hazelnut extract to your vanilla creamer. It’ll give your creamer a nutty, toasty flavor that pairs perfectly with your morning brew.
6. Seasonal Flavors
- Pumpkin Spice Vanilla Creamer: For fall, try adding pumpkin spice and a little extra cinnamon to your creamer. It’s a cozy, autumn-inspired treat!
- Vanilla Peppermint: Around the holidays, add peppermint extract for a refreshing, minty twist that’s perfect for holiday lattes or hot chocolate.
7. Chocolate Vanilla Creamer
For a rich, dessert-like coffee, mix in some unsweetened cocoa powder or chocolate syrup to your vanilla creamer. It’s a great way to satisfy your sweet tooth without overdoing it on sugar.
Conclusion & Call to Action
Making your own homemade vanilla coffee creamer is a simple, fun, and rewarding way to enjoy a healthier, customizable coffee experience. Whether you prefer a classic, rich vanilla flavor or enjoy experimenting with new twists, this easy recipe allows you to create the perfect creamer every time—without all the added sugars and artificial ingredients found in store-bought versions.
Why You Should Try It:
- You control the ingredients—no preservatives or artificial additives.
- It’s cost-effective and quick to make—you’ll save time and money.
- The recipe is customizable—create your own signature flavor and experiment with fun variations.
Now that you know how easy it is to make your own creamer, I encourage you to give it a try and see how much more delicious your morning coffee can be! ☕💕
FAQ’s
How do I make my own coffee creamer at home?
You can make your own coffee creamer by mixing milk or cream with sweeteners and flavors like vanilla, cinnamon, or cocoa. Just blend and store in the fridge for a homemade touch!
Can I put vanilla extract in my coffee creamer?
Yes! Adding vanilla extract to your coffee creamer can give it a delicious, rich flavor. Just a few drops go a long way!
Is it cheaper to make your own coffee creamer?
Yes! Making your own coffee creamer is usually cheaper and lets you customize flavors with simple ingredients like milk, cream, and sweeteners.
Is it safe to put vanilla extract in coffee?
Yes, it’s safe to put vanilla extract in coffee! Just use a small amount, as it’s strong, and opt for pure vanilla extract for the best flavor.