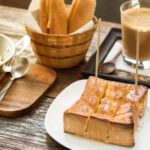
How to Make Espresso Coffee in a Coffee Maker: A Step-by-Step Guide
Do you love the rich, bold kick of espresso but don’t own an expensive machine? You’re not alone. Many coffee lovers assume that without a high-end espresso maker, they’re stuck with weak, watered-down coffee. But here’s the good news: you can make espresso-style coffee using a regular coffee maker!
While a traditional espresso machine uses intense pressure to extract that signature strong, creamy shot, your drip coffee maker, French press, or Moka pot can still brew a powerful, concentrated coffee that’s close enough to satisfy your cravings.
In this guide, we’ll break down:
✅ What makes espresso different from regular coffee
✅ The best coffee makers for an espresso-like brew
✅ Step-by-step methods for drip machines, Moka pots, and French presses
✅ Pro tips to enhance flavor and strength
✅ Common mistakes to avoid
By the end, you’ll be able to make a rich, strong coffee that rivals espresso—without the fancy equipment. Let’s get brewing!

What is Espresso? (And Can You Really Make It in a Coffee Maker?)
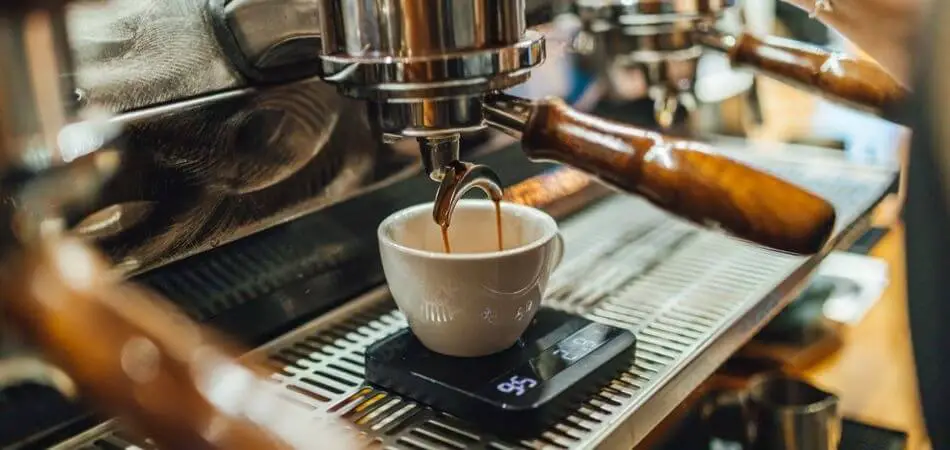
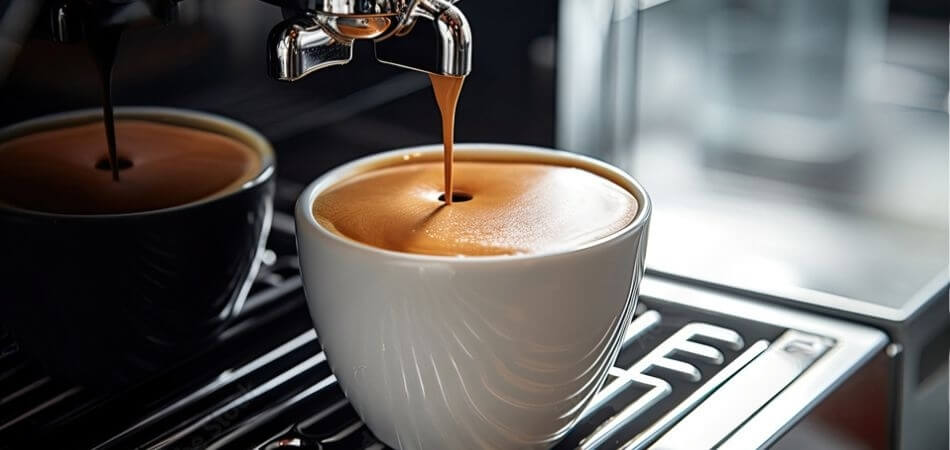
Espresso isn’t just strong coffee—it’s a highly concentrated, full-flavored shot brewed under high pressure (9 bars) in just 25–30 seconds. This process creates:
- A thick, golden crema (the foam on top)
- A bold, syrupy texture
- A more intense caffeine punch per ounce than drip coffee
Can a Regular Coffee Maker Make True Espresso?
Technically, no. Standard drip machines and French presses don’t generate enough pressure. But you can brew a strong, espresso-like coffee by:
✔ Using a fine grind (like powdered sugar)
✔ Reducing water for a concentrated shot
✔ Choosing dark roast beans for deeper flavor
Best Coffee Makers for Espresso-Style Coffee
| Method | Closest to Espresso? | Best For |
|---|---|---|
| Moka Pot | ✅ Very close | Strong, rich coffee with slight crema |
| AeroPress | ✅ Close under pressure | Clean, smooth shots |
| French Press | ⚠ Bold but no crema | Full-bodied, strong coffee |
| Drip Machine | ⚠ Weakest option | Quick, decently strong brew |
Bottom Line: While you won’t get true espresso without a machine, these methods deliver a strong, satisfying alternative.
What You’ll Need
Before we dive into brewing, let’s gather the essentials.
Equipment Checklist
- Coffee Maker (Drip, Moka pot, French press, or AeroPress)
- Burr Grinder (for fine, consistent grounds)
- Filters (paper for drip, metal for Moka/French press)
- Measuring Tools (scale or tablespoons)
- Kettle (for precise water temperature)
Ingredients
- Fresh, Dark Roast Coffee Beans (Espresso or Italian roast preferred)
- Filtered Water (Tap water can add unwanted flavors)
Why Fresh Beans Matter
Pre-ground coffee loses flavor fast. For the best results:
- Grind right before brewing
- Use beans within 2-3 weeks of roasting
- Store in an airtight container away from light
Step-by-Step Brewing Methods
Method 1: Drip Coffee Maker “Espresso”
Best for: Quick, decently strong coffee (not true espresso, but close)
- Grind Your Coffee
- Use an extra-fine grind (almost powdery).
- Pro Tip: If your grinder can’t go fine enough, ask a coffee shop to grind it for espresso.
- Measure Coffee & Water
- Ratio: 2 tbsp coffee per 2 oz water (1:2 ratio).
- Example: For a “double shot,” use 4 tbsp coffee + 4 oz water.
- Brew on “Strong” Setting
- If your machine has a bold/strong brew option, use it.
- If not, use less water than usual for a concentrated cup.
- Optional: Double Brew for Extra Strength
- Run a second brew cycle over the same grounds.
Result: A strong, slightly bitter coffee that works well in milk-based drinks.
Method 2: Moka Pot (Stovetop Espresso)
Best for: The closest thing to real espresso without a machine
- Fill the Base with Hot Water
- Use preheated water (speeds up brewing).
- Fill just below the safety valve.
- Add Fine Coffee Grounds
- Fill the basket loosely (no tamping!).
- Avoid overpacking—it can block steam.
- Assemble & Heat on Medium
- Keep the lid open to monitor brewing.
- When coffee flows smoothly (not sputtering), remove from heat.
Result: A rich, strong coffee with slight crema—perfect for sipping straight.
Method 3: French Press “Espresso”
Best for: Full-bodied, strong coffee (no crema)
- Use Extra-Fine Grounds
- Almost espresso-level fine (but not powdery).
- Steep with Minimal Water
- Ratio: 1:4 (e.g., 3 tbsp coffee + 6 oz water).
- Water temp: 200°F (just off boil).
- Press Slowly & Serve Immediately
- Wait 4–5 minutes, then press gently.
- Pour right away to avoid bitterness.
Result: A bold, full-flavored coffee that’s great for Americanos.
Pro Tips for Better Espresso-Like Coffee
Want to take your brew to the next level? Try these:
✅ Preheat Your Equipment (Rinse with hot water first)
✅ Use Filtered Water (Better taste, no mineral buildup)
✅ Experiment with Ratios (More coffee = stronger brew)
✅ Fake Crema (Whisk a drop of sugar into hot coffee for foam)
Common Mistakes to Avoid
❌ Using pre-ground coffee (Stale = weak flavor)
❌ Overfilling water (Dilutes strength)
❌ Skipping cleaning (Oils clog machines over time)
How to Serve Your Homemade Espresso
- Straight Shot: Sip like a classic espresso.
- Latte/Cappuccino: Add steamed milk.
- Americano: Dilute with hot water.
Frequently Asked Questions Of How To Make Espresso Coffee In Coffee Maker
Can I Make Espresso In A Regular Coffee Maker?
No, you cannot make authentic espresso in a regular coffee maker, as it lacks the necessary pressure.
How Much Espresso Do You Put In A Coffee Maker?
For a standard espresso shot, use about 7-9 grams of ground coffee in your coffee maker.
How To Make Espresso Coffee At Home?
Grind fresh coffee beans to a fine consistency. Heat filtered water to between 195°F-205°F. Tamp the grounds firmly in the portafilter. Secure it to your espresso machine. Brew for 25-30 seconds, aiming for about 1 ounce of espresso. Enjoy your homemade espresso shot.
How Do You Make Espresso In A Single Cup Coffee Maker?
Start by inserting an espresso pod or coffee capsule into your single cup coffee maker. Select the ‘espresso’ setting if available, or use the small cup option. Press start, and allow the machine to brew directly into your cup. Enjoy your freshly made espresso.
What Is An Espresso?
An espresso is a concentrated coffee brew made by forcing hot water through finely-ground coffee beans. It’s rich and bold.
Conclusion
You don’t need a $500 espresso machine to enjoy a strong, rich coffee at home. With the right grind, ratio, and method, your drip maker, Moka pot, or French press can brew a satisfying espresso-style cup.
Ready to try it? Grab your coffee maker and start experimenting! And if you nail the perfect shot, tag us.
Cheers to your coffee-making success!